
The Ultimate Rainbow Cake Recipe – Make It Today!
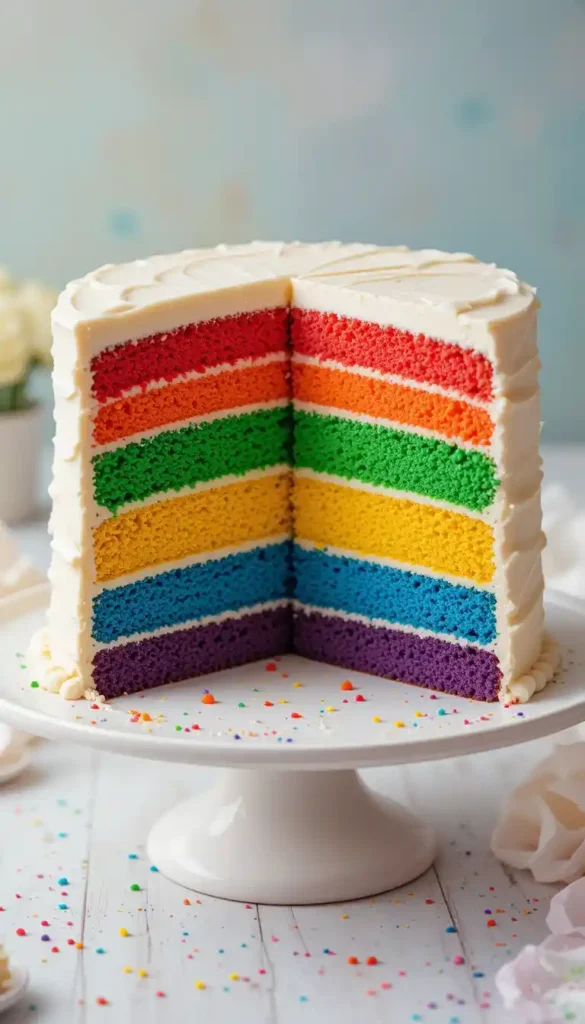
There’s something magical about cutting into a cake and revealing six stunning layers of vibrant rainbow colors. Picture the gasps of delight, the smiles spreading across faces, and the excited chatter that follows. That’s the power of a rainbow cake – it’s not just a dessert but a celebration centerpiece that creates lasting memories.
When my daughter turned seven, I wanted to create something truly unforgettable. After several attempts and refinements, I finally perfected this rainbow cake recipe. The moment I brought it out with its beautiful colored layers, the room fell silent before erupting in applause. That reaction alone made all the mixing, baking, and careful assembly worthwhile.

Today, I’m sharing my tried-and-tested rainbow cake recipe that balances visual wow-factor with genuinely delicious taste – a rare combination in novelty bakes! Follow along to create your showstopping dessert that will have everyone reaching for seconds and asking for your baking secrets.
Table of Contents
Table of Contents
What Makes This Rainbow Cake Special
Many rainbow cakes look impressive but disappoint in taste. This recipe solves that common problem with:
- Perfect color vibrancy without that artificial, chemical taste
- Moist, tender layers that stay fresh for days instead of drying out
- Simplified techniques accessible to bakers of all skill levels
- Make-ahead friendly components for stress-free party preparation
Whether you’re baking for a birthday, a Pride celebration, or simply to brighten someone’s day, this rainbow cake delivers both the visual impact and delicious flavor you’re hoping for.
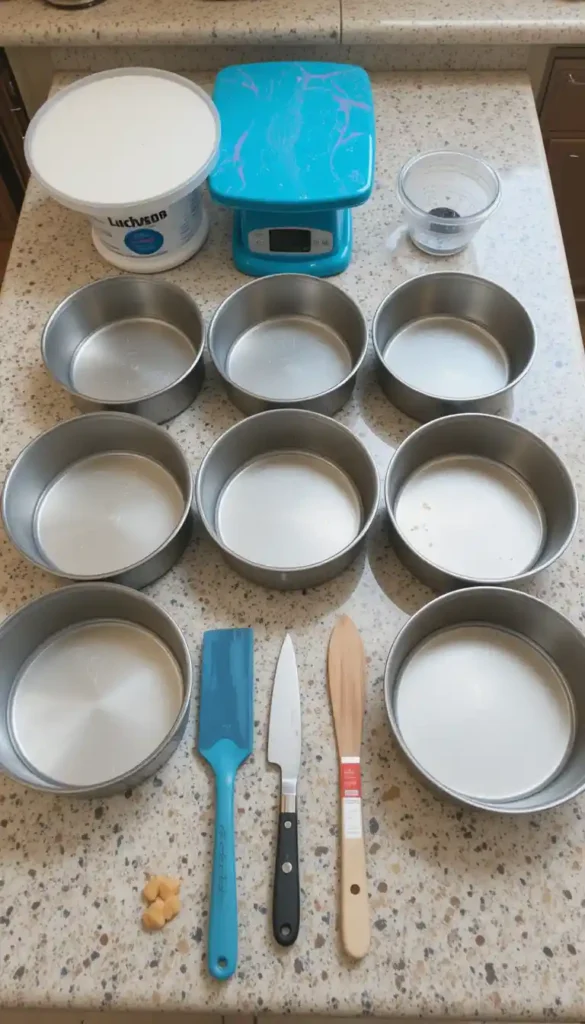
Equipment You’ll Need for Rainbow Cake Success
Before diving into this colorful baking adventure, gather these essential tools to ensure the process goes smoothly:
| Equipment | Purpose | Recommendation |
|---|---|---|
| 6 Round cake pans (8-inch) | For baking all layers simultaneously | Use disposable aluminum pans if kitchen storage is limited |
| Kitchen scale | For precisely dividing batter | Essential for creating even, uniform layers |
| Gel food coloring | For a professional-looking decoration | Wilton or AmeriColor brands provide the best results |
| Offset spatula | For smooth frosting application | Both large and small sizes are helpful for different areas |
| Cake turntable | For professional-looking decoration | Makes frosting application much easier and more even |
| Bench scraper | For perfectly smooth sides | Creates that professional bakery finish |
If you don’t have six identical pans, you can bake in batches, though this will extend your preparation time. Just keep the remaining batter covered at room temperature while waiting.
Rainbow Cake Ingredients
Creating the perfect rainbow cake requires quality ingredients. Here’s everything you’ll need for spectacular results:
For the Vanilla Cake Base
| Ingredient | Amount | Notes |
|---|---|---|
| All-purpose flour | 3¾ cups (450g) | Sifted to prevent lumps and ensure tender cake |
| Granulated sugar | 2¼ cups (450g) | Provides both structure and sweetness |
| Unsalted butter | 1 cup (226g) | Sifted to prevent lumps and ensure a tender cake |
| Egg whites | 9 large | Room temperature for better volume and structure |
| Buttermilk | 1½ cups (360ml) | Creates a wonderfully tender crumb |
| Vanilla extract | 1 tablespoon | Use pure extract, not imitation, for the best flavor |
| Baking powder | 1 tablespoon | Ensures proper rise despite thin layers |
| Salt | 1 teaspoon | Enhances all flavors in the cake |

For the Cream Cheese Frosting
| Ingredient | Amount | Notes |
|---|---|---|
| Cream cheese | 16 oz (450g) | Full-fat, room temperature for smooth mixing |
| Unsalted butter | 1 cup (226g) | The room temperature is needed to blend properly with the cream cheese |
| Powdered sugar | 4-5 cups (500-625g) | Sifted to remove lumps for silky frosting |
| Vanilla extract | 2 teaspoons | Complements the cake flavors beautifully |
| Salt | ¼ teaspoon | Balances sweetness and enhances flavor depth |
For the Colors
For true rainbow vibrancy, you’ll need these gel food colorings:
- Red gel food coloring
- Orange gel food coloring (or mix red and yellow)
- Yellow gel food coloring
- Green gel food coloring
- Blue gel food coloring
- Purple gel food coloring (or mix red and blue)
Step-by-Step Rainbow Cake Method
Preparing Your Kitchen for Rainbow Cake Success
Proper preparation makes the rainbow cake process much more enjoyable:
- Set your oven to preheat at 350°F (175°C) and place the racks in the center.
- Grease and line all cake pans with parchment paper circles cut to fit
- Organize your workspace with separate bowls ready for each color
- Prepare measuring tools for dividing batter evenly – a digital scale works best
- Set out butter, eggs, and cream cheese to reach room temperature if you haven’t already
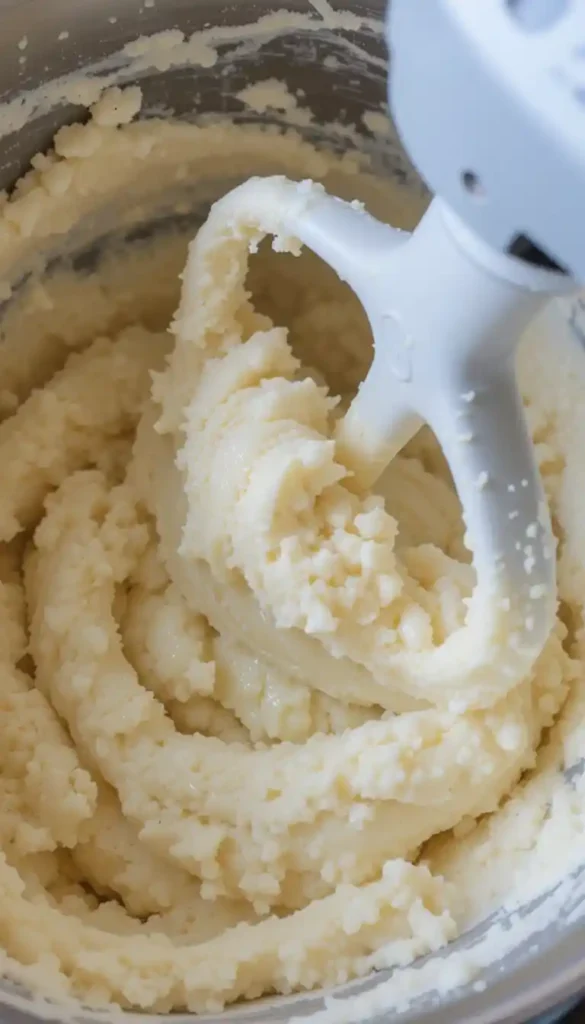
Making the Perfect Vanilla Cake Batter
The foundation of your rainbow cake is a light, flavorful vanilla batter:
- Cream butter and sugar until light and fluffy, about 5 minutes on medium-high speed. Don’t rush this step—proper creaming incorporates air for a tender cake.
- Add egg whites gradually, beating well after each addition until fully incorporated
- Combine dry ingredients (flour, baking powder, and salt) in a separate bowl and whisk together
- Gradually add the dry ingredients and buttermilk to the butter mixture, starting and ending with the dry ingredients (three additions of dry ingredients and two of buttermilk).
- Mix until just combined – overmixing will develop gluten and toughen the cake
- Stir in vanilla extract until fully incorporated
Chef’s Tip: A quality vanilla cake base is crucial for rainbow cake success. The flavor should be strong enough to shine through the food coloring. Don’t skimp on the vanilla extract!
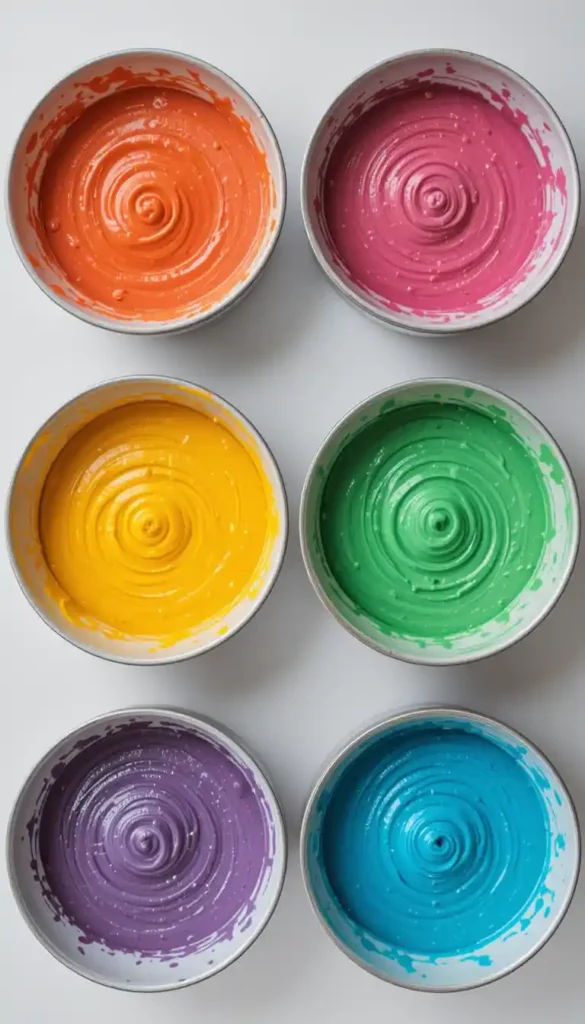
Creating Vibrant Rainbow Layers
Now comes the fun part—transforming your batter into a spectrum of colors:
- Weigh your batter for precise division (total weight should be approximately 1200g)
- Divide evenly into 6 bowls (about 200g per bowl) using your kitchen scale
- Add gel coloring one drop at a time, stirring thoroughly until the desired vibrancy is achieved
- Pour the colored batters into the prepared cake pans, spreading them evenly to the edges.
- Gently tap the pans on the counter to release any air bubbles.
- Bake for 12-15 minutes until a toothpick inserted in the center comes out clean and edges just begin to pull away from the pan
Important: Rainbow cake layers are much thinner than standard cake layers, so they will bake much faster. Watch carefully to prevent overbaking, which leads to a dry cake!
Making Silky Cream Cheese Frosting
While your cake layers cool, prepare the luscious frosting:
- Beat cream cheese and butter until completely smooth, about 3 minutes on medium speed
- Add powdered sugar gradually, one cup at a time, to prevent clouds of sugar dust
- Mix in vanilla and salt until fully incorporated
- Beat on high speed for 3-5 minutes until light and fluffy
- Adjust consistency if needed—add more powdered sugar if too soft, or a splash of heavy cream if too firm
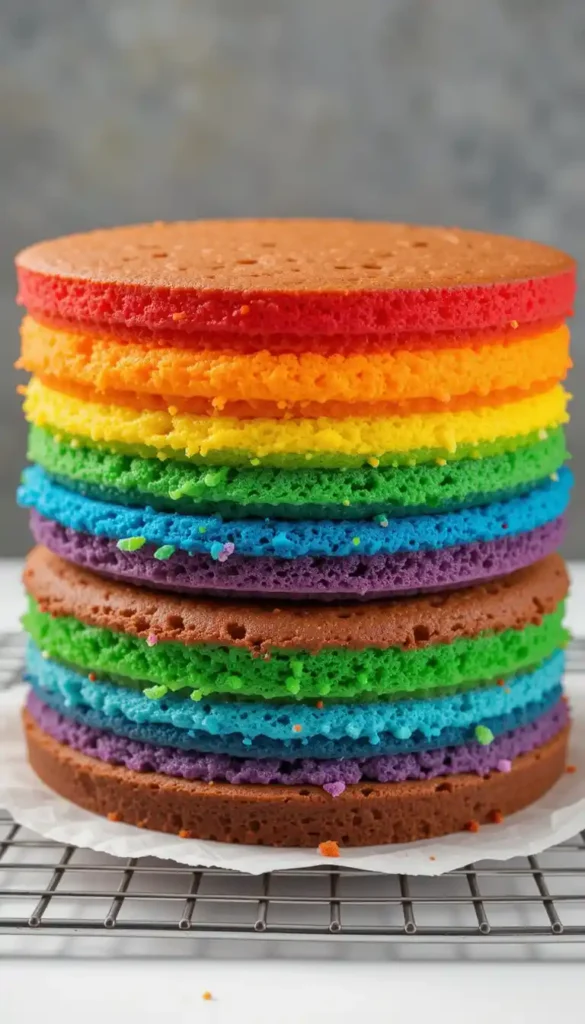
Rainbow Cake Assembly Guide
Stacking Your Rainbow Layers
Creating the perfect rainbow stack requires patience and precision:
- Level cake layers, if needed, using a serrated knife for perfectly flat surfaces
- Place the purple layer on your cake board or serving plate as the base
- Add about 1/3 cup frosting and spread into a thin, even layer with an offset spatula
- Continue stacking in rainbow order: purple, blue, green, yellow, orange, red (bottom to top)
- Press gently on the top layer to secure all layers without squishing
- Check alignment from all angles and adjust if needed before frosting the exterior
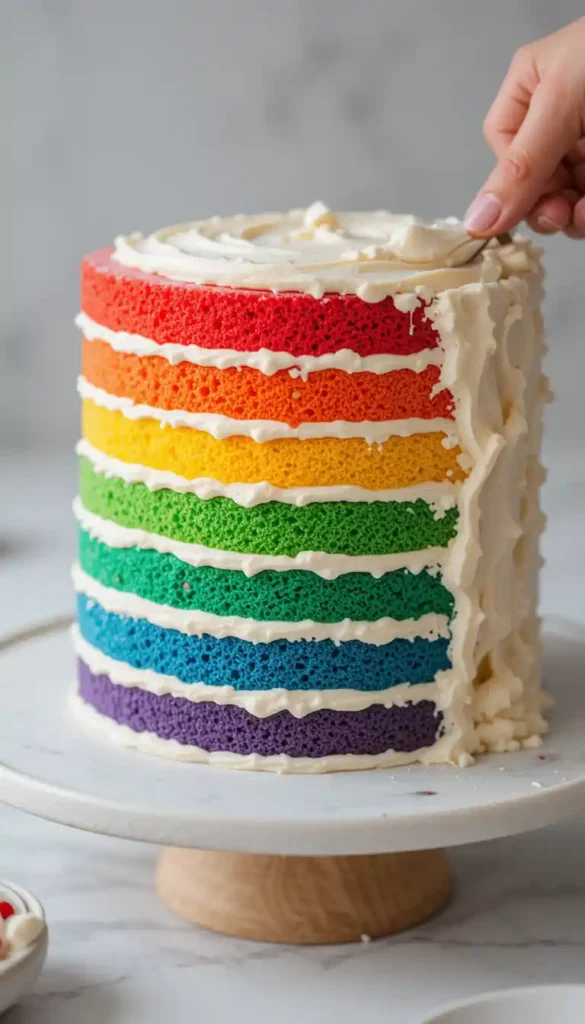
Creating a Perfect Frosting Finish
Now for the finishing touch that will showcase your work:
- Spread a thin crumb coat over the entire cake and refrigerate for 30 minutes to set.
- Add a final frosting layer, starting from the top and working down the sides
- Smooth the sides using a bench scraper held at a slight angle against the cake
- Create decorative swirls on top using an offset spatula for an elegant finish
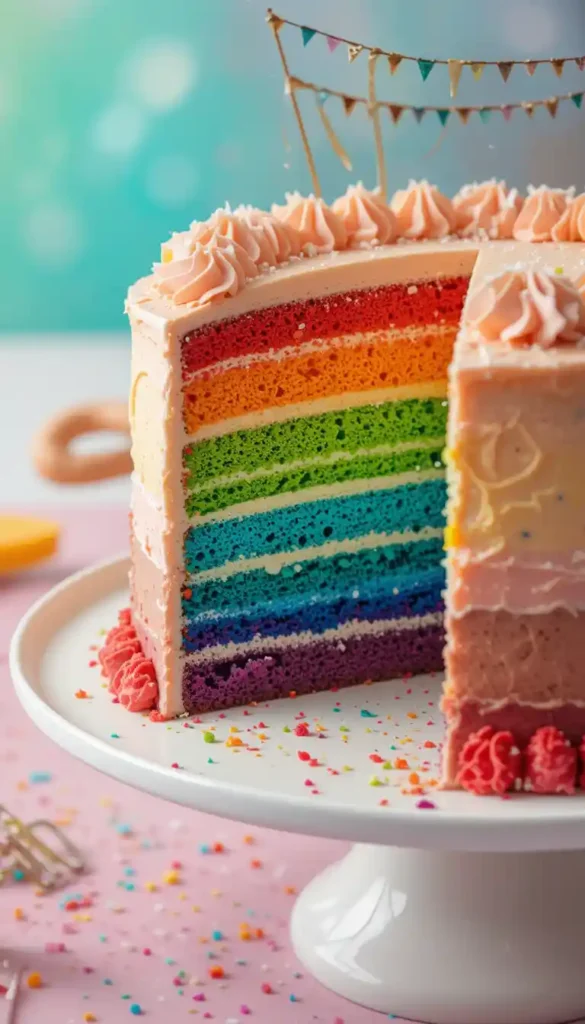
- Add sprinkles, candy, or other decorations if desired for extra flair
Rainbow Cake Storage and Serving Tips
Your masterpiece deserves proper handling to maintain its beauty and flavor:
- Store refrigerated for up to 5 days in a covered cake container
- Bring to room temperature 1-2 hours before serving for the best flavor and texture
- Cut with a warm, clean knife for clean slices that showcase all layers beautifully
- Serves 12-16 people, depending on how generously you cut
- Photograph before cutting to capture your beautiful creation for posterity!
Troubleshooting Your Rainbow Cake
Even experienced bakers encounter challenges. Here’s how to overcome common rainbow cake issues:
| Problem | Possible Cause | Solution |
|---|---|---|
| Bleeding colors | Too much food coloring | Use gel colors and apply sparingly; ensure layers are fully cooled before stacking |
| Dry cake | Overbaking thin layers | Apply thinner frosting layers; chill cake during assembly if the room is warm |
| Uneven layers | Imprecise batter division | Use gel colors and apply them sparingly; ensure layers are fully cooled before stacking |
| Frosting too soft | Ingredients too warm | Chill briefly before continuing; add more powdered sugar if needed |
| Layers sliding | Apply thinner frosting layers; chill the cake during assembly if the room is warm | Frosting is too thick between layers |
Variations on the Classic Rainbow Cake
Once you’ve mastered the basic rainbow cake, try these creative variations:
- Rainbow Cupcakes: Divide batter between cupcake liners and bake for 10-12 minutes; core each cupcake and fill with sprinkles for added surprise
- Ombre Effect: Use varying amounts of one color (like blue) for a light-to-dark gradient effect
- Hidden Rainbow: Cover the entire cake with chocolate ganache for a dramatic surprise when it is cut
- Naked Style: Apply minimal frosting between layers and leave sides partially exposed for a rustic, contemporary look
- Rainbow Cake Pops: Crumble cake layers, mix with frosting, form into balls, and dip in colored white chocolate
Conclusion
Creating a stunning rainbow cake doesn’t have to be intimidating! With this detailed recipe and technique guide, you’ll be able to craft this showstopping dessert that tastes as amazing as it looks. Remember that practice makes perfect – each rainbow cake you bake will be even more beautiful than the last.
The joy of cutting into this cake and revealing those perfect rainbow layers makes every step worthwhile. So gather your ingredients, prepare your colors, and get ready to bake a dessert that will have everyone talking!
Don’t hesitate to share photos of your rainbow cake creation on social media – tag us or use #UltimateRainbowCake so we can celebrate your success. We’d love to see your colorful masterpieces!
Frequently Asked Questions About Rainbow Cake
Can I make this rainbow cake in advance?
Yes, you can bake the rainbow cake layers up to 3 days ahead. Wrap them well in plastic wrap and store in the refrigerator, or freeze for up to 1 month. You can also assemble and frost the cake a day before serving, keeping it refrigerated and covered.
How do I prevent my rainbow cake colors from looking muddy?
Use gel food coloring instead of liquid for your rainbow cake, and be sure to thoroughly mix each color in a separate bowl. Begin with a small amount of coloring and gradually add more until you reach the desired shade. Clean your mixing utensils between colors to avoid contamination.
Can I use natural food coloring for my rainbow cake?
Natural colorings won’t produce the vibrant hues traditional in a rainbow cake, but you can create a more muted rainbow effect using beet powder (pink/red), turmeric (yellow), matcha (green), and butterfly pea flower (blue). Be aware that natural colorings may affect the taste slightly.
Why did my rainbow cake layers sink in the middle?
Thin rainbow cake layers are more prone to sinking if the oven door is opened too early. Keep the door closed until the minimum baking time has passed. Also, make sure your baking powder is fresh, and avoid overmixing the batter, which can weaken the structure.
How many servings does this rainbow cake recipe make?
This six-layer rainbow cake serves 12-16 people, depending on how you slice it. For larger gatherings, consider making two cakes or increasing the recipe by 50%. Remember that because of its height, even smaller slices feel substantial!
Can I make this rainbow cake dairy-free?
Yes! Substitute the butter with plant-based butter, and replace buttermilk with a plant-based milk mixed with 1 tablespoon vinegar per cup. For the frosting, use dairy-free cream cheese and plant-based butter alternatives. The results won’t be identical, but they will still be delicious.
Ready to Make Your Rainbow Cake?
Now it’s your turn to create this showstopping rainbow cake! Follow the recipe, bring the vibrant colors to life, and enjoy a slice of sweetness that’s as beautiful as it is delicious. You won’t regret it!
Tried this recipe? We’d love to hear all about it! Leave a comment below to share your experience or rate the recipe if you loved it.
And don’t forget to share your rainbow cake photos with us on social media. Tag @JoyfulCakes or use #UltimateRainbowCake so we can celebrate your colorful creation together!
Looking for more amazing dessert ideas? Check out these other tasty recipes:
- How to Make the Best Tiramisu Cake at Home
- Panini Bread Recipe
- How to Make Perfect Nutter Butter Cookies at Home
Want more delightful recipes like this?
Follow us on Instagram, Facebook, and Pinterest for baking inspiration, tips, and new recipes.
Subscribe to the Joyful Cakes newsletter for weekly updates, expert baking tips, and new, mouthwatering recipes delivered straight to your inbox!
Did You Try Our Recipe?
There are no reviews yet. Be the first one to write one.