
Chocolate Glazed Donuts
Table of Contents
Table of Contents
Introduction: The Joy of Homemade Donuts
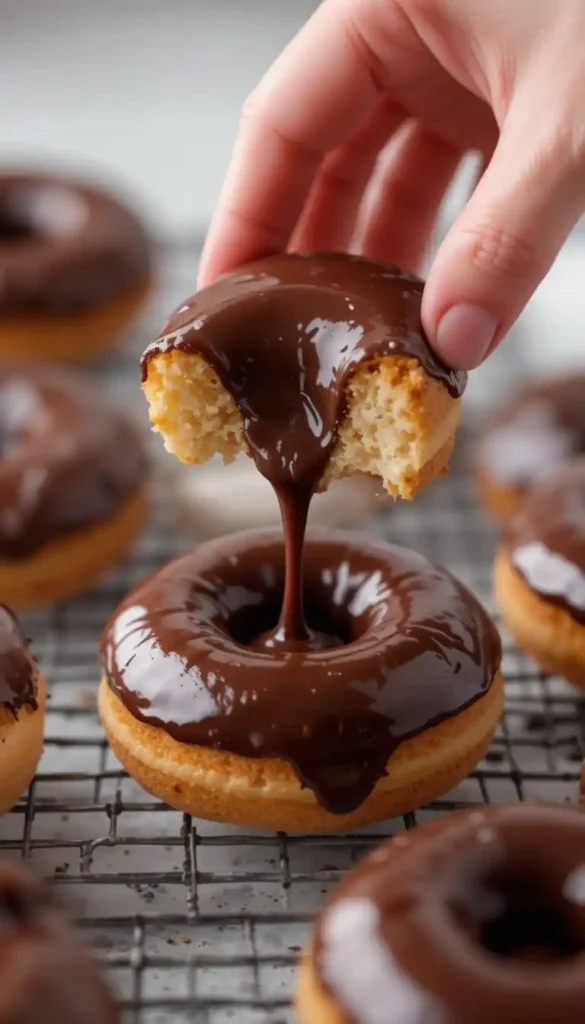
There’s something magical about biting into a fresh, warm, chocolate-glazed donut. The soft, pillowy texture gives way to that perfect chocolate coating that shatters just slightly between your teeth—it’s a simple pleasure that many of us associate with weekend mornings and special treats. But what if you could recreate that bakery-fresh experience right in your kitchen? Today, I’m sharing my journey of mastering homemade chocolate glazed donuts, transforming from a novice who once burned a batch beyond recognition to someone who now has family members requesting “those amazing donuts” for every gathering.

Why Make Chocolate Glazed Donuts at Home?
When store-bought donuts are so convenient, why bother making your own? Here are compelling reasons:
- Freshness: Nothing compares to donuts fresh from your kitchen
- Quality control: Choose your high-quality ingredients
- Customization: Adjust sweetness and chocolate intensity to your preference
- Cost-effective: Make a dozen donuts for less than bakery prices
- Family activity: Create memories while cooking together
- Impressive skill: Wow friends and family with your culinary talents

Essential Equipment for Homemade Chocolate Glazed Donuts
Before diving into the donut-making process, ensure you have these tools ready:
- Stand mixer or a spacious mixing bowl with a handheld electric mixer
- Rolling pin
- Donut cutter (or two circular cutters of varying sizes)
- Thermometer for oil temperature
- Heavy-bottomed pot for frying
- Cooling rack placed over baking sheets
- Whisk for the glaze

Ingredients Overview
For the Donut Dough
| Ingredient | Amount | Purpose |
|---|---|---|
| All-purpose flour | 3½ cups | Structure |
| Granulated sugar | ⅓ cup | Sweetness |
| Instant yeast | 2¼ tsp | Leavening |
| Salt | ¾ tsp | Flavor enhancement |
| Whole milk | ¾ cup | Moisture/richness |
| Eggs | 3 large | Structure/richness |
| Unsalted butter | 5 tbsp | Tenderness |
| Vanilla extract | 2 tsp | Flavor |
| Vegetable oil | 2 quarts | Frying medium |

For the Chocolate Glaze
| Ingredient | Amount | Purpose |
|---|---|---|
| Powdered sugar | 2 cups | Base/sweetness |
| Unsweetened cocoa powder | ⅓ cup | Chocolate flavor |
| Salt | Pinch | Balance |
| Whole milk | ¼ cup | Consistency |
| Light corn syrup | 1 tbsp | Shine |
| Vanilla extract | 1 tsp | Flavor depth |
| Semi-sweet chocolate | ¼ cup, melted | Rich chocolate flavor |
Step-by-Step Donut Dough Preparation
H3: Mixing the Perfect Donut Dough
- Activate the yeast: Warm milk to 110°F, add yeast and 1 tsp of sugar, and let bloom for 5-10 minutes
- Mix the dry ingredients: Whisk the flour, remaining sugar, and salt in the bowl of the stand mixer.
- Add the wet ingredients: Pour in the milk-yeast mixture, eggs, and vanilla extract.
- Mix and knead: Use the dough hook on medium-low speed for 2 minutes, then increase to medium for 4-5 minutes
- Add the butter: Incorporate softened butter, one tablespoon at a time, while the mixer is running.
- Test for readiness: Dough should be soft, elastic, and pull away from the sides of the bowl
H3: First Rise and Shaping
- First rise: Place dough in a greased bowl, cover with plastic wrap, and let rise for 1-1.5 hours until doubled
- Prepare your workspace: Lightly dust your countertop with flour.
- Roll out the dough: Aim for a ½-inch thickness
- Cut donuts: Use a 3½-inch donut cutter (or two circular cutters)
- Prepare for a second rise: Place cut donuts on parchment-lined baking sheets

H3: Second Rise and Final Preparation
- Second rise: Cover donuts loosely with plastic wrap and let rise 30-45 minutes
- Test for readiness: Gently press dough—if it springs back slowly, it’s ready
The Frying Process

H3: Achieving Perfect Fried Donuts
- Heat the oil: Heat vegetable oil to 350°F in a heavy-bottomed pot, ensuring it’s at least 2 inches deep.
- Prepare workspace: Set up cooling racks over baking sheets near your frying station
- Fry donuts: Cook 2-3 donuts at a time for 1-1.5 minutes per side until golden brown
- Monitor temperature: Maintain oil at 350°F between batches
- Drain the donuts: Transfer the fried donuts to cooling racks to allow excess oil to drain off.
Pro Tip: The secret to professional-looking donuts is consistent oil temperature. Too hot and they’ll brown too quickly without cooking inside; too cool and they’ll absorb excess oil and become greasy.
Creating the Perfect Chocolate Glaze

H3: Mixing Your Chocolate Glaze
- Combine dry ingredients: Sift powdered sugar and cocoa powder together to remove lumps
- Add liquid ingredients: Whisk in milk, corn syrup, and vanilla until smooth
- Incorporate melted chocolate: Fold in until fully combined
- Adjust the consistency: If the glaze is too thick, add milk one teaspoon at a time until it reaches the desired thickness.
H3: Glazing Techniques
- Timing matters: Wait until the donuts are cool enough to handle but still warm
- Dipping method: Dip the top half of each donut into the glaze
- Draining excess: Allow excess glaze to drip back into the bowl
- Allow the glaze to set: Place the glazed donuts on a cooling rack for 10-15 minutes to let the glaze firm up.
Variations and Add-ons
Customize your chocolate-glazed donuts with these delicious options:
- Toppings:
- Sprinkles (rainbow, chocolate, seasonal)
- Chopped nuts (toasted for extra flavor)
- Shredded coconut
- Crushed cookies or candy pieces
- Glaze variations:
- Add espresso powder for mocha glaze
- Mix in orange zest for chocolate-orange
- Incorporate peppermint extract for mint chocolate
Storage and Freshness Tips
Keep your donuts tasting fresh:
- Immediate enjoyment: Best consumed within 12 hours
- Short-term storage: Store in an airtight container at room temperature for up to 2 days.
- Freezing option: Store unglazed donuts in the freezer for up to 2 months. Thaw and glaze them before serving.
- Reheating method: 10 seconds in microwave restores just-made texture

Troubleshooting Common Issues
| Problem | Possible Cause | Solution |
|---|---|---|
| Dense donuts | Under-proofed dough | Allow longer rising time |
| Oily donuts | Oil too cool | Maintain 350°F frying temperature |
| Dough too sticky | Too little flour | Add flour 1 tbsp at a time while kneading |
| Cracked glaze | Applied to hot donuts | Let donuts cool slightly before glazing |
| Pale donuts | Oil too hot | Reduce temperature to ensure even cooking |
Conclusion
Making chocolate-glazed donuts at home might seem daunting at first, but with patience and the right techniques, you’ll create bakery-quality treats that will impress everyone. The process becomes easier with practice, and the satisfaction of creating these delicious donuts from scratch is unmatched. Remember that homemade donuts are about the experience as much as the result—embrace the process, experiment with flavors, and enjoy sharing your creations with loved ones.
Frequently Asked Questions
Can I make chocolate-glazed donuts without a stand mixer?
Yes, you can make chocolate-glazed donuts by hand using a large bowl and wooden spoon, though it will require more kneading time (about 10-12 minutes) to develop proper gluten structure.
Is it possible to bake these chocolate-glazed donuts instead of frying them?
While traditional chocolate-glazed donuts are fried, you can bake them at 350°F for 10-12 minutes. The texture will be different—more like a sweet roll than a classic donut—but still delicious with the chocolate glaze.
How can I make chocolate-glazed donuts if I don’t have a donut cutter?
To make chocolate-glazed donuts without a specific cutter, use a 3-inch round cookie cutter or drinking glass for the outer circle and a bottle cap or small shot glass for the center hole.
Can I prepare chocolate-glazed donut dough the night before?
Yes! For time-saving chocolate-glazed donuts, prepare the dough and let it rise slowly overnight in the refrigerator. Bring it to room temperature for 30 minutes before rolling and cutting.
Why did the chocolate glaze for my donuts harden too quickly?
If your chocolate-glazed donut topping sets too fast, add 1-2 teaspoons of additional corn syrup to the mixture, which helps maintain a shiny, workable consistency for longer.
What’s the best oil for frying chocolate-glazed donuts?
For the best chocolate glazed donuts, use a neutral oil with a high smoke point like vegetable, canola, or peanut oil. Avoid olive oil or butter, which will burn at frying temperatures and impact flavor.

Ready to make your batch of irresistible chocolate-glazed donuts?
There’s no better time than now to try this delicious recipe and indulge in homemade goodness! If you’ve tried it, I’d love to hear how your donuts turned out—drop a comment below or give it a rating!
Love this recipe? Share it with your friends on social media and let them in on the donut magic! And don’t forget to tag me when you share your creations—I’d love to see your sweet success!
Craving more sweet treats? Check out these related recipes for even more dessert inspiration:
For more irresistible recipes straight to your inbox, be sure to subscribe to our newsletter or follow us on Instagram (@JoyfulCakes) for daily sweet inspiration. Let’s keep baking together!
Git more recipes you might like
- Top 10 Cake Recipes.
- Cookie Cereal Recipe.
- Artesano Bread.
- Aphrodisiac Chocolates.
- Perfect French Press Coffee.
- Venetian Ice Cream Flavors.
Did You Try Our Recipe?
There are no reviews yet. Be the first one to write one.