
Chocolate Gummies Recipe
Table oc Contents
Table of Contents
Have you ever craved the perfect balance of chewy texture and rich chocolate flavor in one bite-sized treat? I still remember the first time I made chocolate gummies at home – the surprise on my children’s faces when they discovered these weren’t store-bought candies but something we created together in our kitchen. It’s truly amazing how a few simple ingredients can come together to create irresistible gummy chocolate bites that delight both kids and adults alike. Whether you’re looking for a healthier alternative to commercial candies or simply want to enjoy a fun cooking project, these homemade chocolate gummies will become your new favorite treat.

Why Make Homemade Chocolate Gummies?
Before we dive into the recipe, let’s talk about why making your chocolate gummies is worth your time:
- Ingredient control: You decide exactly what goes into your treats
- Customizable: Adjust sweetness and flavor intensity to your preference
- Cost-effective: Much cheaper than premium store-bought options
- Fun activity: Perfect for rainy days or family bonding
- Impressive gifts: Package them in cute containers for homemade presents
When you make chocolate gummies at home, you’re not just creating a tasty treat – you’re crafting an experience. The process is straightforward enough for beginners yet satisfying for seasoned kitchen enthusiasts. Let’s explore everything you need to know to make perfect Gummy Chocolate Bites every time.
Essential Ingredients for Perfect Chocolate Gummies
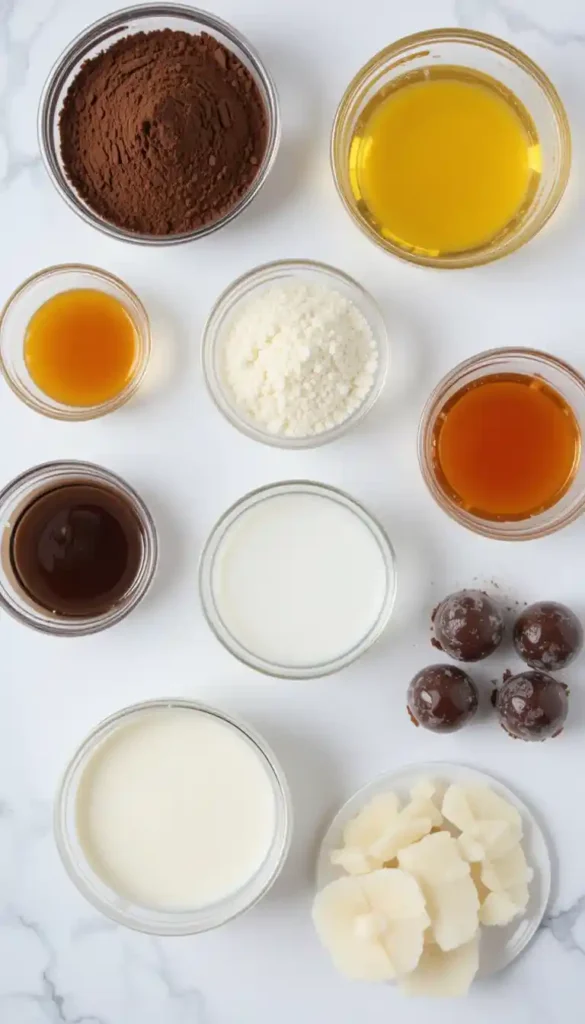
Creating delicious chocolate gummies starts with quality ingredients. Here’s everything you’ll need to gather before starting your candy-making adventure:
What You’ll Need
| Ingredient | Amount | Purpose |
|---|---|---|
| High-quality cocoa powder | 3 tablespoons | Provides rich chocolate flavor |
| Gelatin powder | 3 tablespoons | Creates the gummy texture |
| Coconut milk | 1 cup | Adds creaminess |
| Honey or maple syrup | 3-4 tablespoons | Natural sweetener |
| Vanilla extract | 1 teaspoon | Enhances flavor |
| Pinch of salt | 1/8 teaspoon | Balances sweetness |
Notes on ingredients:
The quality of your cocoa powder significantly impacts the flavor of your chocolate gummies. Opt for dutch-processed cocoa for a smoother, less bitter chocolate flavor. If you prefer a more intense chocolate experience, consider using a combination of cocoa powder and melted dark chocolate chips (about 1/4 cup).
For gelatin, unflavored beef gelatin works best for the traditional gummy texture. However, if you’re looking for vegetarian options, read our FAQ section below for alternatives.
Equipment Needed
| Tool | Purpose |
|---|---|
| Silicone molds | For the heating mixture |
| Small saucepan | For heating mixture |
| Whisk | For smooth blending |
| Measuring spoons | For accurate measurements |
| Dropper or small spoon | For filling molds |
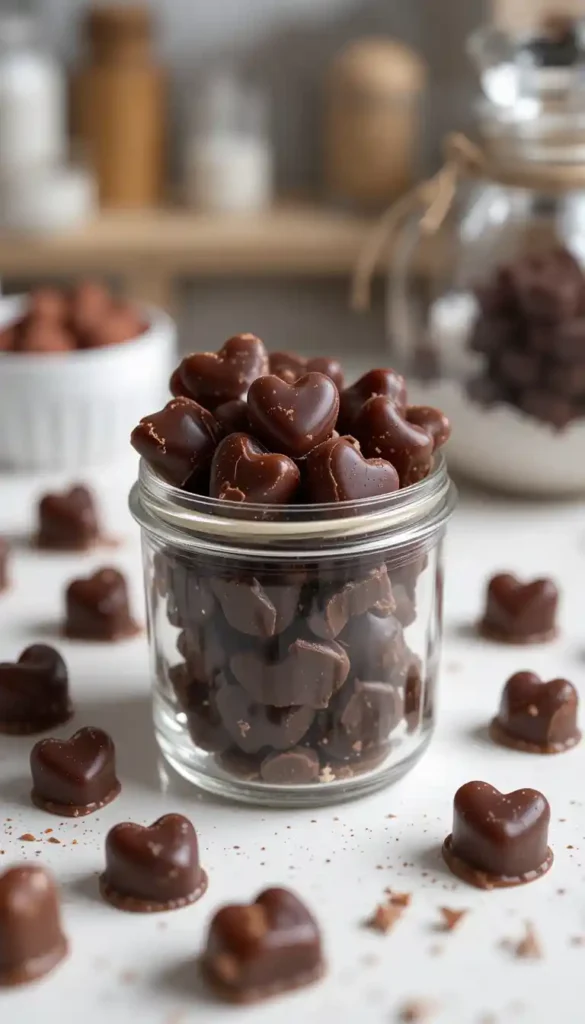
Silicone molds come in various shapes and sizes, from classic bears to hearts, stars, or even themed shapes for holidays. Choose molds that excite you and your family – the shape can make your chocolate gummies even more special!
The 3 Simple Steps to Perfect Chocolate Gummies
Now that you’ve gathered your ingredients and equipment, let’s break down the process into three manageable steps. Follow these carefully, and you’ll have delicious chocolate gummies in no time.
Step 1: Prepare Your Gelatin Mixture
The foundation of perfect Gummy Chocolate Bites starts with properly prepared gelatin. This step is essential to get that perfect chewy consistency.
- Add 1/4 cup of cold water to a small mixing bowl.
- Evenly sprinkle the gelatin powder over the surface of the water.
- Allow it to “bloom” for 5 minutes until expanded and gel-like
- The gelatin should look swollen and slightly translucent when ready
This blooming process allows the gelatin to hydrate properly before heating, ensuring your chocolate gummies will have that perfect consistency you’re looking for.
Pro Tip: Never add gelatin directly to hot liquid as it will form clumps that are difficult to dissolve. Always bloom in cold liquid first!
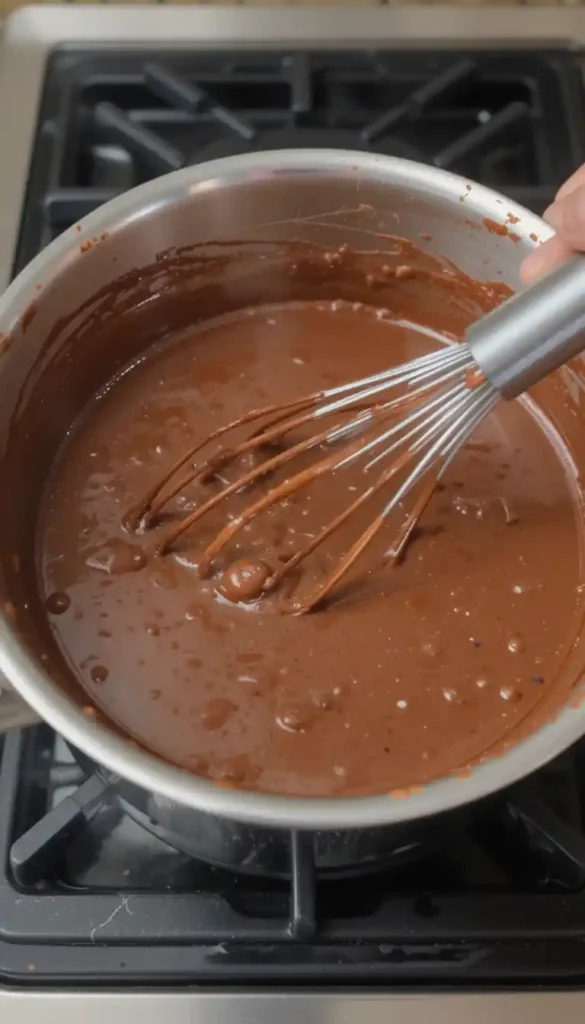
Step 2: Create Your Chocolate Base
This is where the magic happens – transforming basic ingredients into a rich chocolate mixture that will become the base of your gummies.
- In a saucepan, warm coconut milk over low heat (do not allow it to boil)
- Once warm, whisk in cocoa powder until completely dissolved with no lumps
- Add your sweetener of choice (honey or maple syrup) and stir until incorporated
- Mix in the bloomed gelatin, stirring continuously until fully dissolved
- Add the vanilla extract and a pinch of salt, stirring continuously until the mixture becomes smooth and fully combined.
- Remove from heat once all the ingredients are fully blended and the mixture is smooth.
The mixture should have a smooth, glossy texture without any lumps. Take your time with this step – rushing could lead to grainy chocolate gummies.
Flavor variations to explore:
- Add 1/4 teaspoon peppermint extract for chocolate mint gummies
- Stir in 1/2 teaspoon of cinnamon for a spiced twist on your chocolate gummies.
- Mix in 1 tablespoon of instant coffee for mocha gummies
- Add 1/2 teaspoon orange zest for chocolate orange gummies
Each variation offers a unique twist on classic chocolate gummies, allowing you to customize based on your preferences or what might pair well with other treats you’re serving.
Step 3: Mold and Set Your Gummies
The final step transforms your chocolate mixture into perfectly formed treats.
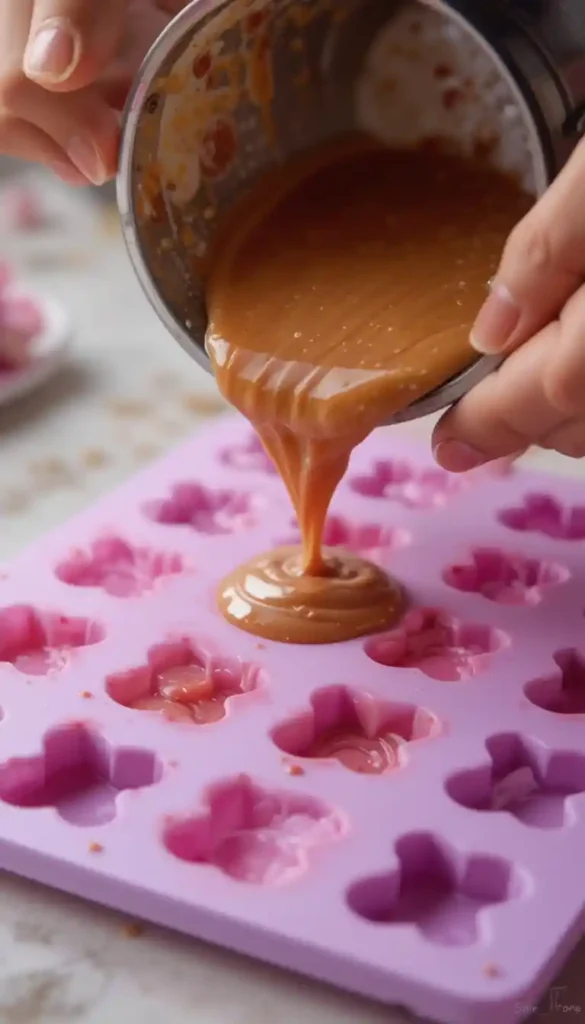
- Allow the mixture to cool slightly (about 2-3 minutes) so it’s easier to handle
- Pour or use a dropper to fill each cavity in your silicone molds
- Gently tap the molds on the counter to release any trapped air bubbles.
- Refrigerate for at least 2 hours, preferably overnight, for the best texture
- Once fully set, carefully push each gummy out from the bottom of the mold
- Keep your chocolate gummies in an airtight container and refrigerate them for storage.
Your patience will be rewarded with perfectly set chocolate gummies that have just the right amount of chew and a rich chocolate flavor that melts in your mouth.
For special occasions, consider dusting your gummies with a light coating of cocoa powder or a mixture of cocoa and powdered sugar for an elegant finishing touch.
Troubleshooting Common Chocolate Gummy Problems
Even experienced candy makers encounter challenges. Here’s how to solve common issues with your chocolate gummies:
Texture Issues
| Problem | Solution |
|---|---|
| Too soft | Add additional gelatin (1/2 tbsp more) in your next batch |
| Too firm | Reduce gelatin or increase liquid slightly next time |
| Grainy texture | Ensure cocoa powder is fully dissolved before adding gelatin |
| Not setting properly | Check gelatin quality and bloom time; increase refrigeration time |
Flavor Balance
| Concern | Adjustment |
|---|---|
| Not chocolatey enough | Increase cocoa powder by 1/2 tbsp or add 2 tbsp melted chocolate |
| Too bitter | Add additional sweetener to taste (1 tbsp at a time) |
| Flavor seems flat | Reduce the sweetener and increase cocoa slightly in your next batch |
| Too sweet | Reduce the sweetener and increase the cocoa slightly in your next batch |
Remember that making perfect chocolate gummies might take practice, but even “imperfect” batches will likely be delicious! Take notes on what works best for your taste preferences and adjust accordingly.
Health Benefits of Homemade Chocolate Gummies
Your homemade chocolate gummies aren’t just delicious – they can be nutritious too! Here’s what makes these treats better than store-bought alternatives:
- Gelatin: Supports joint health, may improve skin elasticity, and contains protein
- Cocoa powder: Rich in flavonoids and antioxidants that support heart health
- Natural sweeteners: Provide sweetness without the blood sugar spikes of refined sugar
- Coconut milk: Rich in medium-chain triglycerides (MCTs) and beneficial fats.
When you make chocolate gummies at home, you’re creating a treat that satisfies your sweet tooth while providing beneficial nutrients. By using quality ingredients and natural sweeteners, these gummies become a relatively guilt-free indulgence.
Special Occasions for Chocolate Gummies
These versatile treats are perfect for many occasions:
- Birthday parties: Make them in fun shapes for party favors or as cake toppers
- Holiday gifts: Package in decorative containers with a handwritten note
- School lunches: A homemade alternative to processed candies
- Movie nights: Pair with popcorn for a sweet-and-salty combo
- Bake sales: Offer something unique that stands out from typical cookies and brownies
For gifting, consider packaging your chocolate gummies in small decorative jars or clear gift bags tied with ribbon. Include a handwritten tag with storage instructions and a note about the special homemade touch.
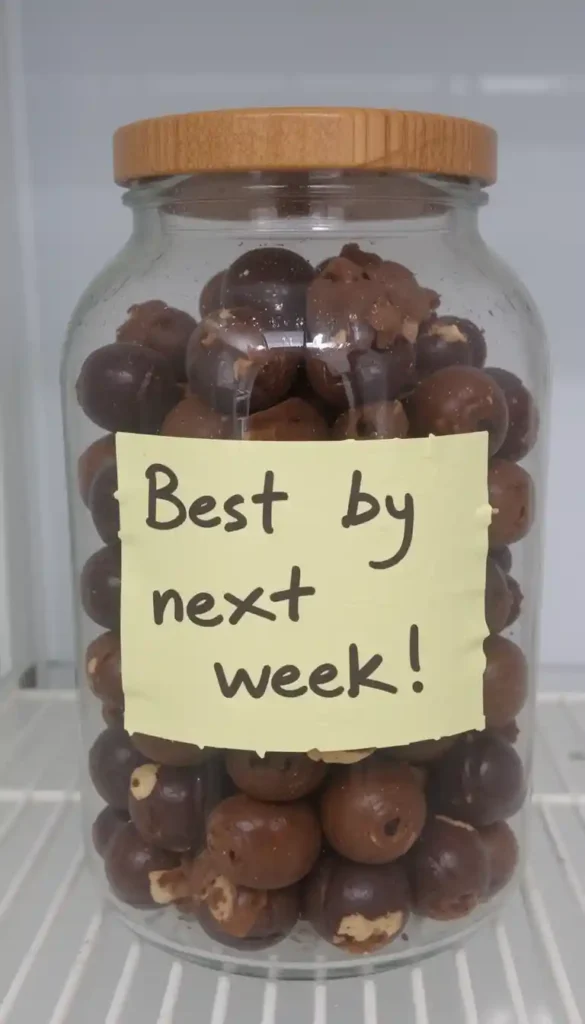
Storage and Serving Suggestions
To keep your chocolate gummies fresh and delicious:
- Keep them in an airtight container in the refrigerator for up to 7-10 days.
- Separate layers with parchment paper to prevent sticking
- For extended storage, freeze them for up to 3 months.
- Allow frozen gummies to thaw in the refrigerator before serving
Serving ideas:
- Create a dessert board featuring your chocolate gummies alongside fresh fruit and nuts
- Use as edible decorations on cakes or cupcakes
- Enjoy them alongside a cup of coffee or tea for a delightful afternoon snack.
- Serve alongside wine for a sophisticated dessert option (particularly nice with red wine!)
Conclusion
Making delicious chocolate gummies at home is surprisingly simple with just three key steps. By controlling the ingredients, you can create treats that are not only tastier than store-bought options but also healthier and personalized to your preferences. The joy of creating these treats extends beyond just eating them—it’s about the process, the customization, and the satisfaction of making something special from scratch.
The next time you’re craving something sweet, skip the candy aisle and head to your kitchen instead. With minimal ingredients and equipment, you can create batches of chocolate gummies that will impress friends and family alike. The versatility of this recipe means you can experiment with flavors, shapes, and serving options to make these treats uniquely yours.
FAQ About Chocolate Gummies
Can I make chocolate gummies without gelatin?
Yes, you can substitute gelatin with agar-agar powder for vegetarian chocolate gummies. Use about 1 tablespoon of agar-agar powder in place of the 3 tablespoons of gelatin. Note that the texture will be slightly different – agar-agar creates a firmer set than gelatin.
How long do homemade chocolate gummies last?
When stored in an airtight container in the refrigerator, homemade chocolate gummies typically last 7-10 days. You’ll know they’re past their prime if they start to dry out or develop an off taste.
Is it possible to substitute regular milk for coconut milk?
Yes, you can use dairy milk to make chocolate gummies, but the consistency may be slightly different, and the shelf life could be reduced. For a richer texture, whole milk is preferable over skim milk when making chocolate gummies.
Are these chocolate gummies healthy?
Homemade chocolate gummies can be healthier than store-bought versions, as you control the ingredients and can use natural sweeteners and high-quality cocoa. While they still contain sugar, they offer some nutritional benefits from gelatin and cocoa.
Can I make chocolate gummies with less sugar?
Begin with half of the suggested amount and adjust according to your taste preferences.
What causes chocolate gummies not to set properly?
The most common reasons chocolate gummies don’t set are insufficient gelatin, overheating the mixture (which can damage gelatin’s setting properties), or not allowing enough cooling time. Always follow the blooming process and avoid boiling the mixture.
Ready to Make These Gooey Chocolate Gummies?
We’d love to hear how your chocolate gummies turned out.
Tried this recipe? Leave a comment and a star rating below — your feedback helps other readers and supports the blog.
If you took a photo, feel free to tag us on Instagram @JoyfulCakes. We enjoy seeing your homemade creations!
Looking for more delicious ideas? You might enjoy:
Want more recipes like this delivered straight to your inbox? Subscribe to our newsletter and stay inspired with new treats, tips, and ideas.
Follow us on Pinterest, Facebook, and Instagram for daily dessert inspiration and exclusive content.