
Croissant Bread Recipe
Croissant bread might just be the most indulgent loaf you’ve ever made—until now.
Craving the rich, buttery layers of a classic French croissant, but don’t want to roll out dozens of pastries? What if you could enjoy that same flaky perfection… in a sliceable, toastable, totally irresistible loaf of bread?

Welcome to your new baking obsession: croissant bread. In this post, you’ll discover how to make this luxurious hybrid, where artisan bread meets Parisian pastry. I’ll guide you step-by-step through the recipe, show you exactly how to master the lamination process, and share pro tips to get those signature golden layers every time.
Ready to upgrade your breakfast, brunch, or sandwich game? Let’s bake!
What Makes Croissant Bread Special?
Unlike standard homemade bread, croissant bread utilizes a lamination technique – folding butter into dough multiple times to create distinct layers. When baked, these layers create that signature pull-apart texture that makes this loaf so special. The process takes some time and patience, but the results are worth it.
What you’ll love about this recipe:
- Perfect texture balance – crisp exterior with a tender, flaky interior
- Versatile slices – sturdy enough for sandwiches but delicate enough for breakfast
- Impressive appearance – beautiful swirled layers that wow guests
- Make-ahead friendly – can be partially prepared the day before baking
- Adaptable recipe – works well with sweet or savory variations
This isn’t just another bread recipe – it’s an experience that transforms your kitchen into a French bakery, filling your home with an irresistible aroma that draws everyone to the table.
Essential Ingredients for Perfect Croissant Bread
The quality of your ingredients directly impacts the final result of your croissant bread. Here’s what you’ll need to gather before starting:
| Ingredient | Amount | Notes |
|---|---|---|
| All-purpose flour | 4 cups (500g) | Unbleached provides better flavor |
| Active dry yeast | 2¼ tsp (7g) | One standard packet |
| Granulated sugar | ¼ cup (50g) | Feeds yeast and adds slight sweetness |
| Salt | 1½ tsp (9g) | Enhances overall flavor profile |
| Warm milk | 1 cup (240ml) | 110°F (43°C) – not too hot! |
| Eggs | 2 large | Room temperature works best |
| Unsalted butter (for dough) | ¼ cup (57g) | Softened to room temperature |
| Unsalted butter (for lamination) | 1½ cups (340g) | Cold but slightly pliable |
| Egg wash | 1 egg + 1 tbsp water | For that golden-brown finish |
Equipment You’ll Need
Before diving into the recipe, ensure you have these tools ready:
- Stand mixer with dough hook (or strong arms for kneading!)
- Rolling pin
- 9×5-inch loaf pan
- Pastry brush
- Plastic wrap
- Kitchen towels
- A ruler or measuring tape (helpful for even layers)
- Parchment paper
- Sharp knife or pastry cutter
Having everything prepared before you start will make the process much smoother, especially during the lamination stages, where working quickly helps maintain the proper temperature of your dough and butter.
Step-by-Step Croissant Bread Method
Preparing the Base Dough
- Activate the yeast: In your mixer bowl, combine warm milk (110°F/43°C) with 1 tablespoon of the sugar. Sprinkle the yeast on top and allow it to sit for 5-10 minutes until it becomes foamy. If your mixture doesn’t foam, your yeast might be inactive – start fresh!
- Mix dry ingredients: In a separate bowl, whisk together flour, remaining sugar, and salt.
- Combine wet and dry: Add eggs to the foamy yeast mixture, then gradually add the flour mixture while mixing on low speed.
- Develop the gluten: Once roughly combined, increase the speed to medium and knead for 5-7 minutes until the dough becomes smooth and elastic.
- Incorporate butter: With the mixer running, add softened butter in small pieces, allowing each to incorporate before adding the next. Continue kneading until the dough becomes soft and smooth and pulls away from the sides of the bowl (about 3-5 minutes more).
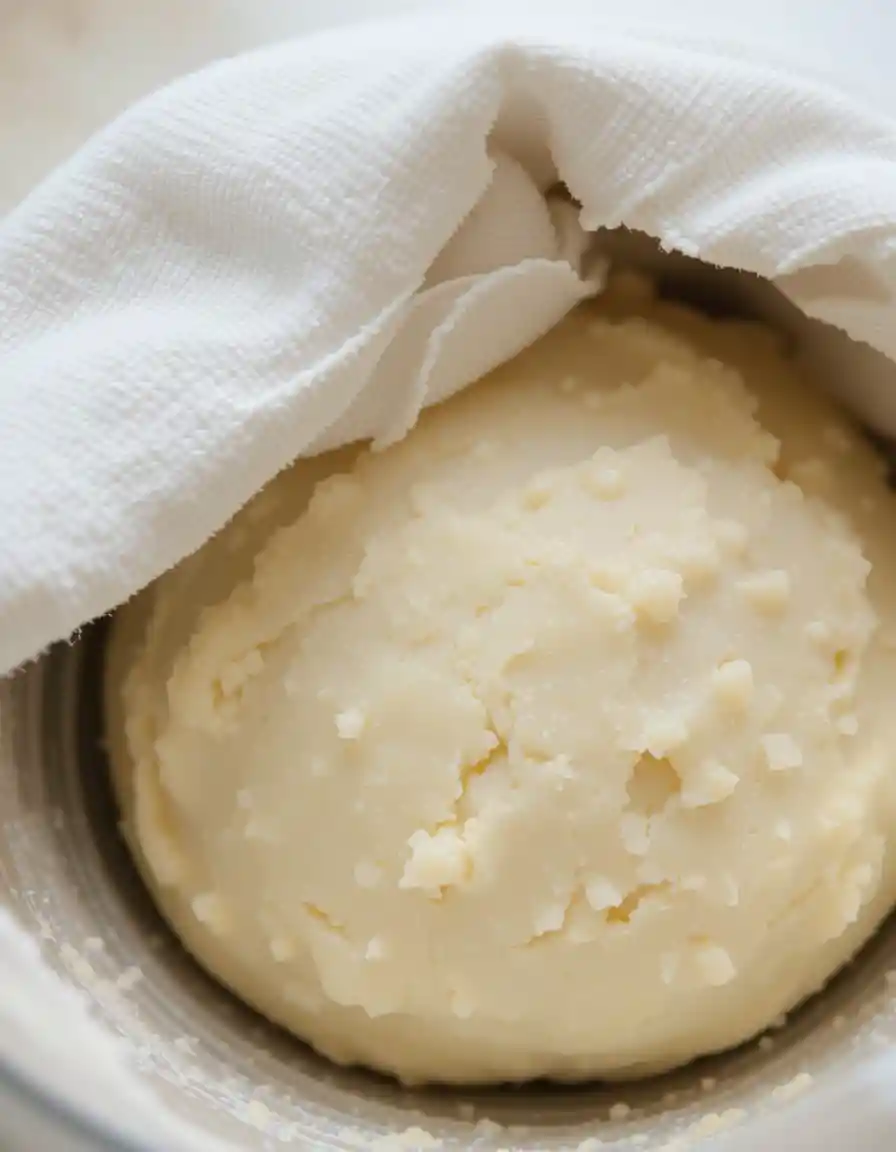
- First rise: Place the dough in a lightly greased bowl, cover with plastic wrap or a damp towel, and let rise in a warm place until doubled in size (approximately 1-1½ hours).
Creating the Butter Layer
While your dough rises, prepare the butter layer:
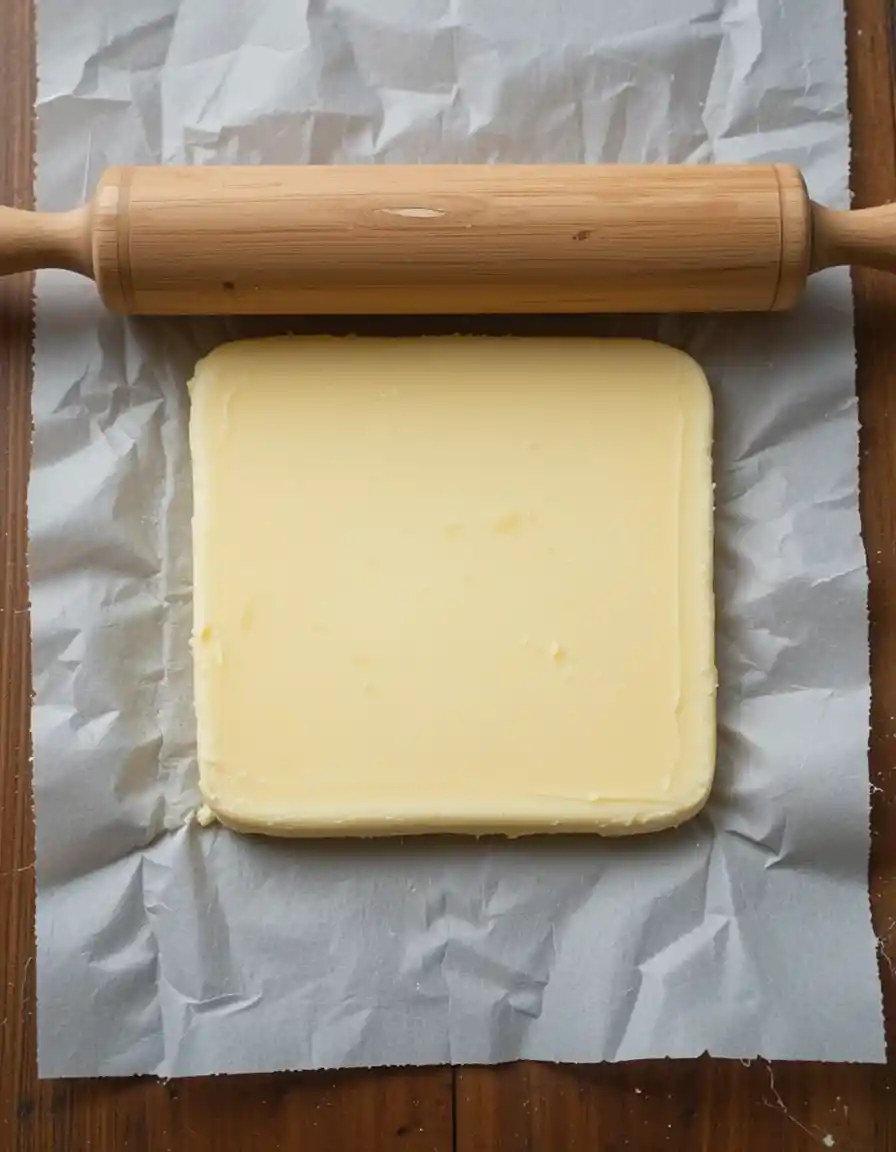
- Transfer the cold butter between two sheets of parchment paper.
- Using a rolling pin, gently pound and roll the butter into a 6×9-inch rectangle about ¼-inch thick.
- Once shaped, refrigerate until ready to use.
Pro tip: The perfect butter consistency is cool but pliable, like modeling clay. Too cold, and it will shatter when folded; too warm, and it will melt into the dough instead of creating distinct layers.
Lamination Process – Creating Those Magical Layers
- Punch down risen dough and turn onto a lightly floured surface. Roll into a rectangle approximately 12×18 inches.
- Position the butter layer in the center of your dough rectangle, removing the top parchment paper. The butter should cover about two-thirds of the dough area.
- Complete first fold: Fold the top third of the dough (without butter) down over the center third. Then fold the bottom third up over both layers – like folding a business letter. Pinch seams to seal.
- First turn: Rotate the dough 90 degrees so the open ends face to your right and left. Roll out again to a 12×18-inch rectangle, being careful not to expose the butter.
- Second fold: Repeat the letter fold process (fold top third down, bottom third up).
- Rest the dough: Wrap in plastic and refrigerate for 1 hour. This rest period allows the gluten to relax and the butter to firm up slightly.
- Complete two more turns: After chilling, perform steps 4-6 twice more for a total of three turns. Remember to rotate the dough 90 degrees before each new rolling session.
The lamination process is where magic happens – each fold multiplies the layers, creating that distinctive croissant texture. Work efficiently but don’t rush; maintaining proper temperature is key.
Shaping and Final Rise
- After the final turn and chill, roll the dough into a rectangle approximately 12×16 inches and ¼-inch thick.
- Cut the dough lengthwise into 3-4 equal strips.
- Roll each strip from one end to create a spiral, placing each coil into your prepared loaf pan, seam side down.
- Cover loosely with plastic wrap and let rise until nearly doubled and puffy, about 1-2 hours depending on room temperature.
Baking to Golden Perfection
- Preheat your oven to 375°F (190°C) with a rack in the middle position.
- Gently brush the risen dough with egg wash for a glossy, golden finish.
- Bake for 35-40 minutes, rotating halfway through. If the top browns too fast, cover it loosely with aluminum foil.
- Test for doneness: the bread should sound hollow when tapped on the bottom, and an instant-read thermometer should register 190°F 88°C when inserted into the center.
- Allow the bread to cool in the pan for 10 minutes, then move it to a wire rack to cool completely before slicing.

Serving and Storage Tips
Your croissant bread truly shines when served fresh from the oven after cooling slightly. The contrast between the crisp exterior and tender interior is at its peak within the first few hours of baking.

Perfect Pairings
- Serve warm slices with high-quality salted butter and honey or jam
- Create extraordinary breakfast sandwiches with eggs and cheese
- Use as the base for the most incredible French toast you’ve ever tasted
- Try savory applications with herb butter or alongside soups and stews
“The true test of croissant bread comes when you slice through the top – listen for that subtle crackle of the crust giving way to reveal swirls of buttery layers beneath. That sound signals perfection.”
Storage Recommendations
Even the best croissant bread begins to lose its optimal texture after the first day. Here’s how to maximize enjoyment:
| Storage Method | Duration | Notes |
|---|---|---|
| Room temperature | 1-2 days | Store in airtight container or bread bag |
| Refrigerator | 5-7 days | Wrap tightly in plastic wrap or foil |
| Freezer | Up to 3 months | Double-wrap in plastic wrap and foil or freezer bags |
Reheating Instructions
Refresh your stored bread with these simple techniques:
- Room temperature slices: 10-15 seconds in the microwave or 3-5 minutes in a 300°F oven
- Refrigerated bread: Allow to come to room temperature, then warm in a 300°F oven for 5-7 minutes
- Frozen slices: Thaw at room temperature, then toast lightly or warm in the oven
Troubleshooting Common Issues
Even experienced bakers occasionally encounter challenges when making croissant bread. Here are solutions to the most common problems:
- Butter leaking during baking: Your dough or butter was likely too warm. Next time, ensure proper chilling between turns and before baking.
- Dense texture without distinct layers: This often happens when the dough is overworked or the butter melts into the dough instead of creating separate layers. Work in a cool kitchen and keep everything chilled.
- Dough not rising properly: Check that your yeast is fresh and active, and ensure your rising environment is warm enough (around 75°F/24°C is ideal).
- Uneven browning: Rotate your pan halfway through baking, and consider using foil to shield areas that brown too quickly.
- Center still doughy when crust is brown: Lower your oven temperature by 25°F and bake longer, using foil to prevent over-browning.
Delicious Variations To Try
Once you’ve mastered the basic croissant bread, experiment with these creative variations:
- Chocolate-swirled: Spread a thin layer of chocolate hazelnut spread or sprinkle chocolate chips before the final shaping
- Cinnamon sugar: Mix ½ cup brown sugar with 2 tablespoons cinnamon and sprinkle between layers before shaping
- Herb and cheese: Add 1 cup grated Gruyère and 2 tablespoons fresh herbs to the dough during the final turn
- Almond: Spread almond cream (frangipane) between layers for a rich, nutty flavor profile
- Orange cardamom: Add orange zest and ground cardamom to the dough for a fragrant twist
Remember to adjust baking times slightly for filled variations, as they may require an extra few minutes in the oven.

Conclusion
Creating croissant bread at home truly represents the perfect marriage of artisanal bread-making and French pastry techniques. While it requires patience and attention to detail, the result – a stunning loaf with beautiful spiraling layers and that unmistakable buttery flavor – delivers satisfaction that few other baking projects can match.
The process itself becomes meditative – the rhythmic rolling and folding, watching the dough transform with each turn, and finally witnessing it puff magnificently in the oven. Your kitchen fills with an aroma that simply can’t be matched by store-bought alternatives.
Whether you’re serving it for a special breakfast, using it for everyday sandwiches, or simply enjoying a slice with your afternoon coffee, this croissant bread elevates ordinary moments into something truly special. The skills you develop making this recipe will serve you well in numerous other baking adventures.
So take your time, follow the steps carefully, and prepare to amaze yourself with what you can create in your kitchen. Your croissant bread journey starts now, and the delicious results will keep you coming back to this recipe again and again.
Frequently Asked Questions About Croissant Bread
How is croissant bread different from regular bread?
Croissant bread incorporates the lamination technique used in pastry-making, creating distinct buttery layers throughout the loaf. Regular bread has a more uniform crumb structure without these flaky layers. The result is bread with the convenience of a loaf but the delicate, pull-apart texture of a croissant.
Is it possible to make croissant bread without using a stand mixer?
Absolutely! Although a stand mixer simplifies the process, you can mix and knead the dough by hand. Combine ingredients in a large bowl using a wooden spoon, then knead on a lightly floured surface for 10-12 minutes until smooth and elastic. The lamination process remains the same regardless of how you prepare the initial dough.
Why did my butter leak out during baking?
Butter leakage typically occurs when either your dough becomes too warm during lamination or your oven temperature isn’t hot enough when you first put the bread in. Make sure to chill your dough adequately between turns, work in a cool kitchen, and ensure your oven is fully preheated before baking.
Can I prepare croissant bread dough ahead of time?
Yes! This dough works beautifully with overnight refrigeration. Complete the lamination process, shape the loaf, then place it in the refrigerator overnight for a slow rise. The next morning, allow it to come to room temperature and complete the final rise (about 1-2 hours) before baking.
What’s the best way to slice croissant bread?
Allow your croissant bread to cool completely before slicing to prevent compressing the layers. Use a sharp, serrated knife and a gentle sawing motion rather than pressing down, which helps preserve those beautiful layers. For best results, cut slices at least ½-inch thick.
How can I make my croissant bread even flakier?
For maximum flakiness, ensure your butter block is evenly shaped, work in a cool environment, and be precise with your folds. Using European-style butter with higher fat content can also enhance flakiness. Additionally, a slightly longer final rise can help develop more air pockets between layers.

Ready to Bake Your Croissant Bread?
Give this recipe a try and enjoy the buttery, flaky layers. If you loved it, please leave a comment, rate the recipe, or share your creation on social media—we’d love to hear from you!
Looking for more delicious recipes?
Don’t miss out—subscribe to our newsletter or follow us on Facebook and Pinterest for more mouthwatering recipes delivered straight to you.
Git more recipes you might like
- Cake Toppers.
- Cookie Cereal Recipe.
- Artesano Bread.
- Aphrodisiac Chocolates.
- Best Swiss Coffee.
- Venetian Ice Cream Flavors.