
How to Store Sourdough Bread
There’s nothing quite like the satisfaction of slicing into a loaf of perfect sourdough bread—that crackling crust giving way to a tender, chewy interior with those beautiful open pockets that took days to develop. But after putting all that love and effort into baking your sourdough masterpiece, watching it go stale or moldy within days can be heartbreaking.
Have you ever baked a gorgeous loaf only to find it turned rock-hard just 24 hours later? You’re not alone. Through countless trials and bread storage experiments, I’ve discovered that proper storage isn’t just an afterthought—it’s essential to preserving your sourdough’s texture, flavor, and lifespan.
In this complete guide, you’ll learn everything about how to store sourdough bread properly to maintain that freshly baked quality for as long as possible. These techniques work whether you’ve baked your loaf or brought home an artisanal sourdough from your local bakery.
What Makes Sourdough Bread Different?
The Science Behind Sourdough Storage
Before diving into storage methods, you need to understand why sourdough behaves differently from commercial bread. Your sourdough bread has unique properties that affect how it should be stored:
- Natural preservatives: The lactic acid bacteria in your sourdough naturally extend shelf life
- Lower pH: Creates an environment that resists mold growth longer than commercial yeast breads
- Robust crust: Provides natural protection, but can soften quickly with improper storage
- Open crumb structure: It can dry out faster than denser breads if not stored correctly
Grasping the unique characteristics of sourdough bread is the key to storing it correctly. Its natural acidity and fermentation process gives it advantages, but also presents unique challenges.”
These special characteristics mean that traditional bread storage methods might not work best for your sourdough loaves. The good news? With the right approach, your sourdough can maintain quality for days longer than conventional bread.
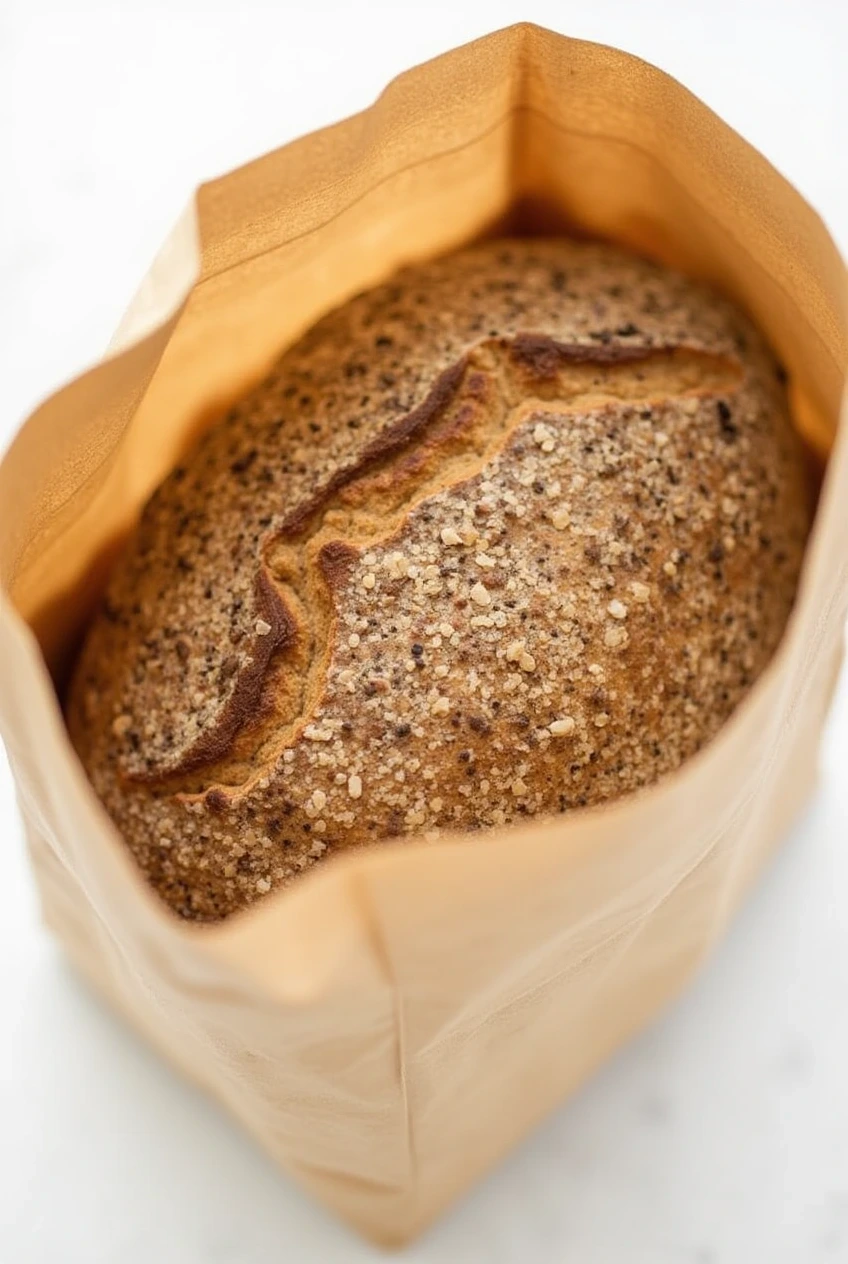
Tip #1: The Paper Bag Method – First 24 Hours
Why Paper Bags Work Best Initially
For the first day after baking, storing sourdough bread in a paper bag creates the ideal environment for your fresh loaf. This method works because it:
- Allows excess moisture to escape
- Maintains crust crispness
- Prevents condensation that softens the crust
- Creates breathability while providing basic protection
How to use the paper bag method:
- Make sure your bread has completely cooled (at least 2 hours after baking)
- Place the bread, crust-side down, in a clean paper bag
- Leave the bag slightly open for additional airflow if you live in a humid climate
- Store at room temperature away from direct sunlight
- Use this method when crust quality is your top priority
The paper bag method shines for same-day consumption when you want to preserve that perfect crackling crust. Many bakeries use paper bags for this exact reason – they understand that maintaining proper moisture balance is crucial during those first 24 hours.

Tip #2: The Cutting Board Technique – Preserving the Cut Side
Protecting Your Bread’s Exposed Interior
Once you’ve cut into your beautiful sourdough, you’ve created a vulnerable, exposed surface that needs protection. The cutting board technique is perfect for partially eaten loaves:
- Place your cut sourdough loaf, cut-side down, on a wooden cutting board
- Leave uncovered for up to 24 hours
- Let the wood absorb excess moisture while allowing the bread to breathe
- Enjoy how this preserves crust quality while protecting the exposed crumb
This method works particularly well for bread you plan to finish within a day and highlights the importance of protecting the cut surface.
Many bread lovers overlook this simple technique, but it’s remarkably effective for short-term storage. The wooden surface creates just the right environment to protect the cut face of your bread without trapping moisture against the crust.
Tip #3: Bread Box Storage – The Medium-Term Solution
Balancing Humidity and Airflow
For keeping your sourdough fresh beyond a day or two, investing in a quality bread box creates the perfect microclimate:
- Optimal humidity: Prevents your bread from drying out too quickly
- Sufficient airflow reduces condensation and mold risk
- Temperature regulation: Maintains consistent environment
Bread Box Comparison:
| Material | Pros | Cons | Best For |
|---|
| Wooden | Natural humidity control, aesthetic appeal | More expensive, requires occasional maintenance | Serious bread enthusiasts, humid climates |
| Ceramic | Good temperature regulation, traditional look | Heavier, can chip or break | Dry climates, temperature fluctuations |
| Metal | Durable, easy to clean | Can trap moisture if not ventilated | Modern kitchens, beginners |
| Plastic | Affordable, lightweight | Less breathable, can trap too much moisture | Occasional bread bakers, budget option |
How to use a bread box effectively:
- Place your bread in the box after the initial 24-hour paper bag period
- Avoid storing with other food items that could transfer moisture or odors
- Consider adding a clean cloth to absorb excess moisture in humid environments
- Expect 3-5 days of freshness, depending on humidity and bread composition
A good bread box isn’t just an attractive kitchen accessory—it’s a practical tool that extends your sourdough’s life through careful environmental control. The small investment pays off in fewer wasted loaves and more consistent quality.

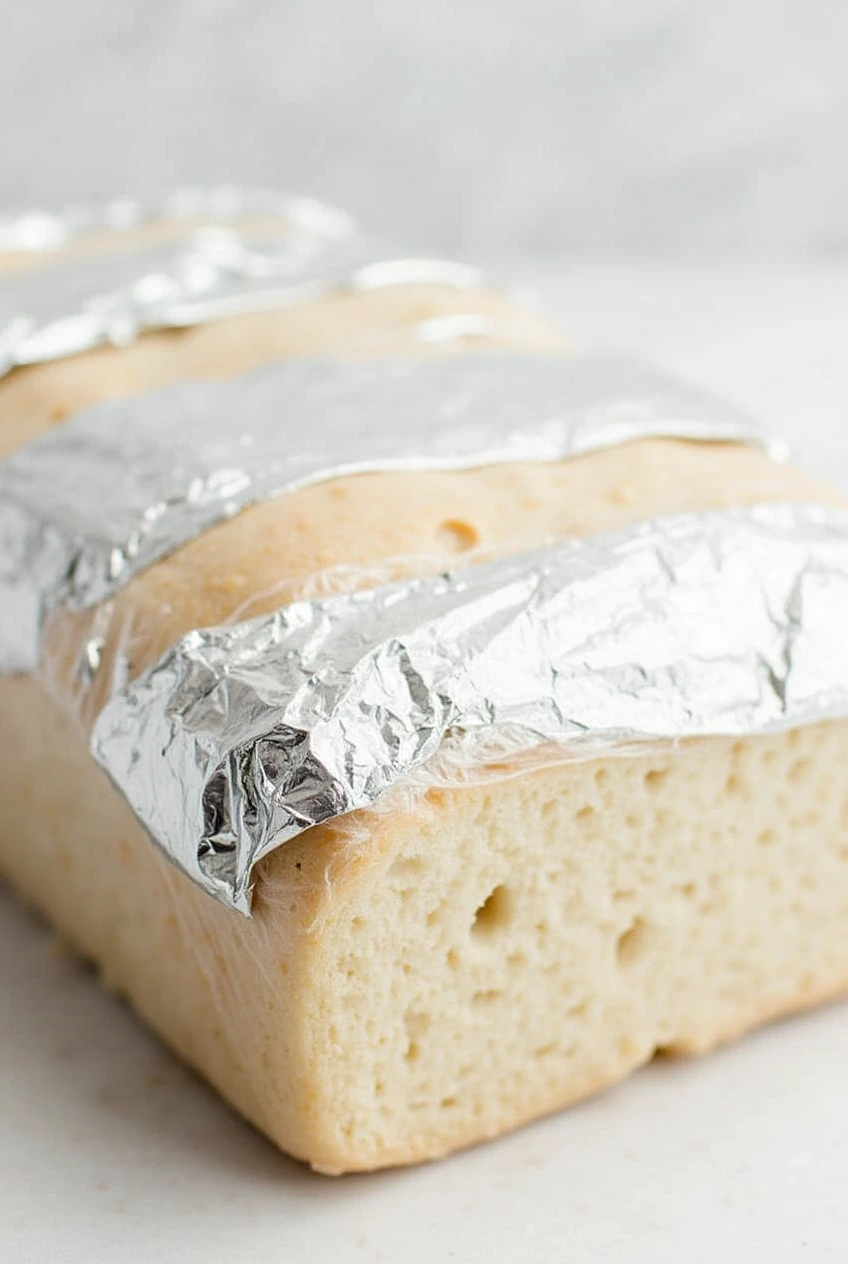
Tip #4: Freezer Storage – The Long-Term Preservation Method
Freezing Techniques for Sourdough
When you need to preserve your sourdough for weeks or months, proper freezing techniques maintain quality remarkably well:
- Allow your bread to cool completely (at least 4 hours after baking)
- Slice the bread before freezing for convenience (optional but recommended)
- Double-wrap tightly in plastic wrap followed by aluminum foil or freezer bag
- Label with date and type of bread
- Freeze for up to 3 months
Thawing Process:
| Method | Time Required | Best For | Notes |
|---|
| Room Temperature | 2-3 hours (whole loaf) | Best texture, closest to fresh | Plan ahead for optimal results. |
| Toaster | 1-2 minutes (single slices) | Immediate use | Results in a slightly drier texture. |
| Oven Refresh | 10-15 minutes at 350°F | Whole loaves, restoring crust | Wrap loaf in foil, then unwrap for last 5 minutes for crispness. |
| Microwave | 10-20 seconds | Emergencies | Use low power, not recommended for optimal texture. |
The freezer method allows you to enjoy homemade sourdough on demand without sacrificing quality. Pre-slicing before freezing makes weekday toast incredibly convenient without any noticeable texture loss.
Many bakers make double batches specifically for freezing, ensuring they always have quality sourdough on hand without baking every few days. The key is proper wrapping to prevent freezer burn and maintaining a constant freezer temperature.
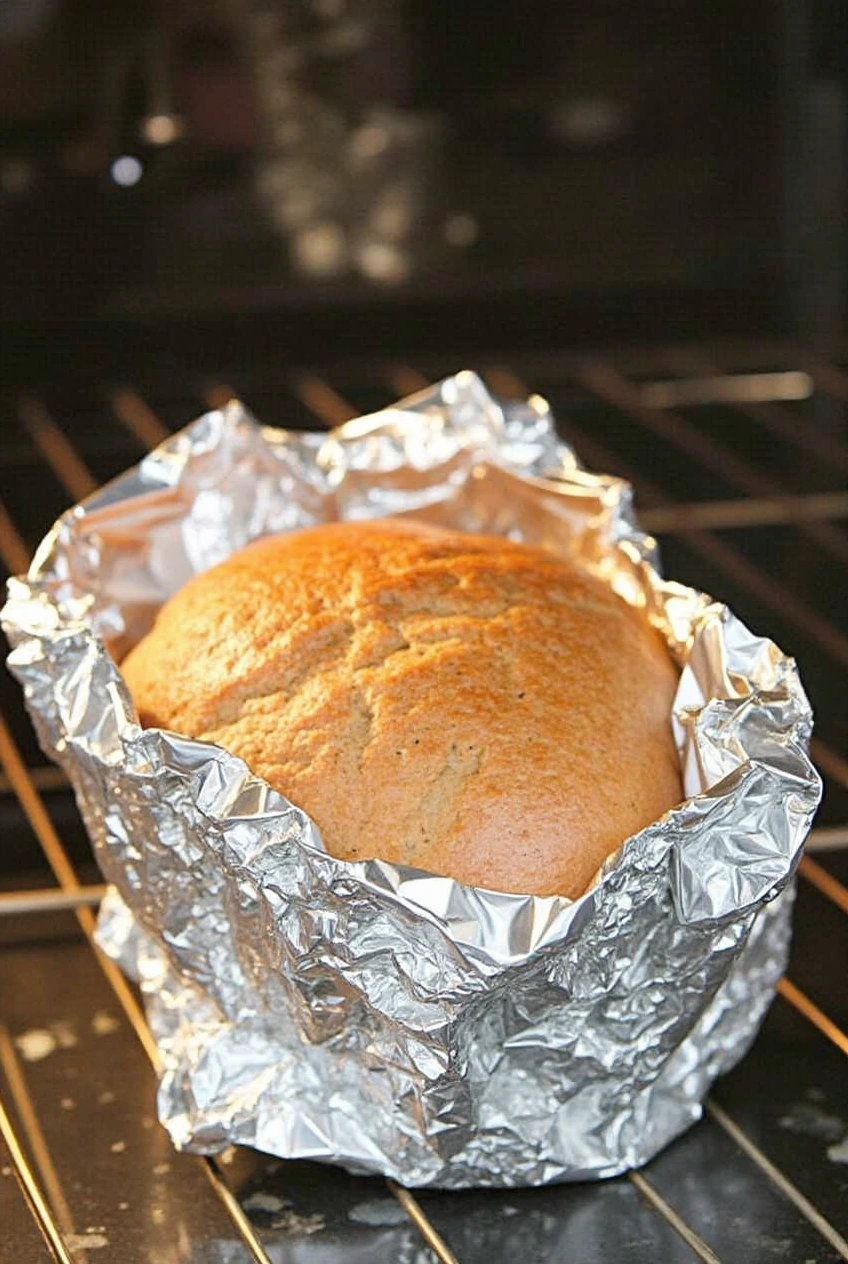
Tip #5: Refreshing Techniques – Bringing Stale Bread Back to Life
Reviving Sourdough’s Texture and Flavor
Even with perfect storage, sourdough eventually loses its initial quality. These refreshing techniques can help bring new life to your bread:
- Oven refresh method: 5-10 minutes at 350°F with light water spritz
- Steam revival: Place in 325°F oven alongside a pan of water for 5-7 minutes
- Toasting: Transforms slightly stale bread into delicious toast
- French toast transformation: Perfect use for sourdough that’s 3+ days old
Step-by-step oven refresh:
- Preheat your oven to 350°F
- Lightly mist the crust with water using a spray bottle
- Wrap the loaf loosely in aluminum foil
- Heat for 5-10 minutes, depending on loaf size
- For extra crust crispiness, remove foil for the final 2 minutes
- Allow to cool slightly before serving
This technique works because it reactivates starches in the bread, temporarily reversing the staling process. While not quite as perfect as fresh-baked bread, it dramatically improves both the texture and flavor of day-old bread.
Storage Method Comparison – Which Is Right for Your Bread?
When deciding how to store your sourdough, consider how quickly you’ll eat it and which qualities matter most to you:
| Storage Method | Freshness Period | Best For | Crust Quality | Crumb Quality |
|---|
| Paper Bag | 1-2 days | Crust preservation | Excellent | Good |
| Cutting Board | 1 day | Partially eaten loaves | Very good | Good |
| Bread Box | 3-5 days | Medium-term storage | Good | Very good |
| Linen Bread Bag | 2-3 days | Natural materials, gift presentation | Very good | Good |
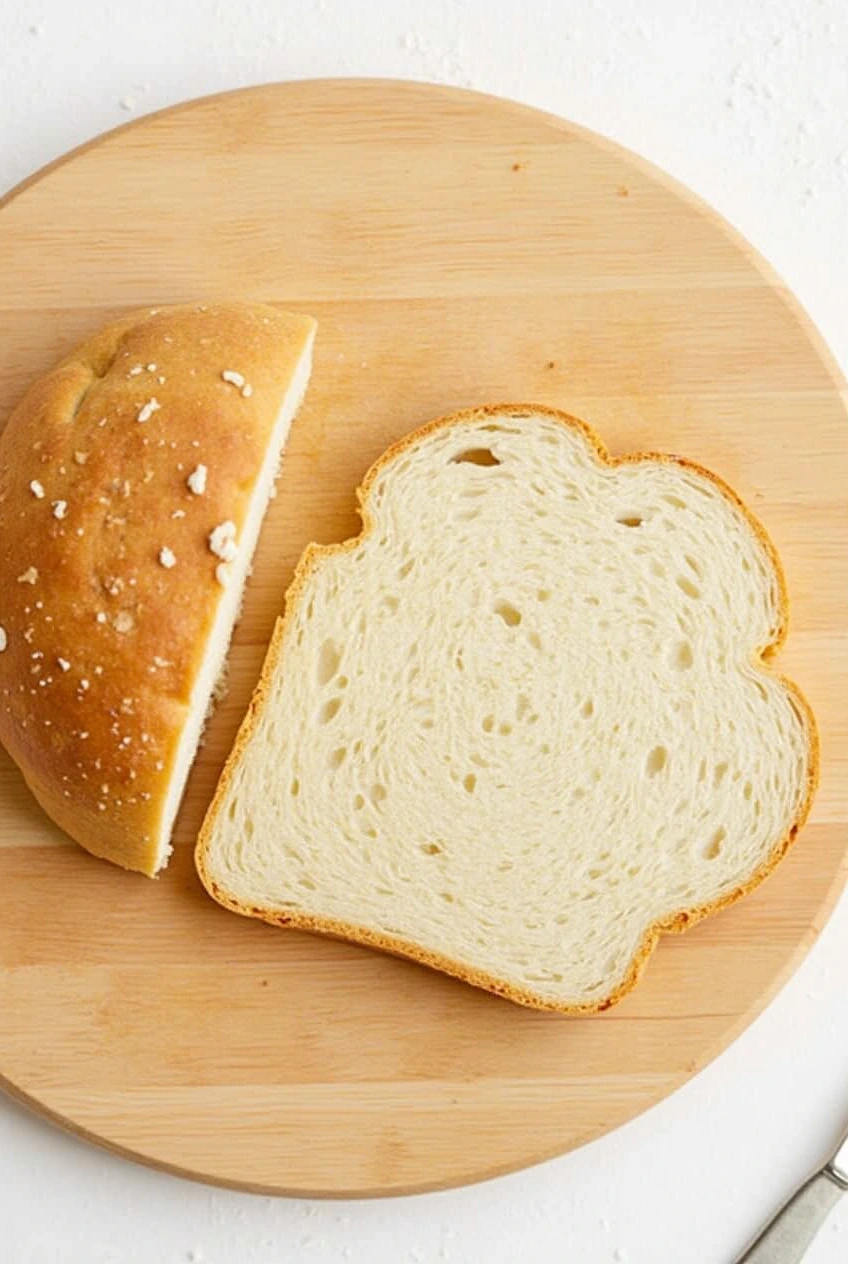
| Plastic Bag | 5-7 days | Soft crust preference | Poor | Excellent |
| Freezer | Up to 3 months | Long-term preservation | Good (after reheating) | Very good |
The ideal approach often involves combining methods—starting with a paper bag, transitioning to a bread box, and freezing any portions you won’t consume within a few days.
Common Sourdough Storage Mistakes to Avoid
Pitfalls That Ruin Good Bread
Watch out for these common errors that can quickly turn your perfect sourdough into a disappointing experience:
- ❌ Storing bread while still warm (causes condensation and sogginess)
- ❌ Refrigerating your sourdough (accelerates staling)
- ❌ Using airtight plastic containers (traps too much moisture)
- ❌ Keep bread near fruits that emit ethylene gas
- ❌ Slicing the entire loaf at once when not needed
“The refrigerator is the worst place for bread. The temperature range actually accelerates the staling process through a phenomenon called retrogradation.”
The refrigerator mistake is particularly common—many people assume cold temperatures preserve all foods. For bread, however, refrigeration speeds up the recrystallization of starches, making your sourdough go stale faster than if it is kept at room temperature!
Conclusion: Perfecting Your Sourdough Storage Strategy
The journey to perfect sourdough doesn’t end when you take it out of the oven. How you store your bread is just as important as how you make it. By understanding the science behind sourdough storage and implementing these five expert tips, you can significantly extend your bread’s freshness and enjoy that perfect balance of crisp crust and tender crumb for days longer.
Remember that different storage methods serve different purposes—from preserving that crackling crust in the short term to keeping slices ready for toasting months later. Experiment with these techniques to find the perfect approach for your baking style, climate, and consumption habits.
With these sourdough storage strategies in your repertoire, you’ll never have to suffer through stale bread again! Your family and friends will be amazed at how you maintain that “fresh-from-the-oven” quality days after baking.
Frequently Asked Questions
Q: Is it okay to store sourdough bread in the refrigerator?
A: It’s not recommended to store sourdough bread in the refrigerator, as the cool temperature accelerates staling through a process called retrogradation. Your bread will become firm and dry much faster than at room temperature.
Q: How long does homemade sourdough bread last?
A: Properly stored homemade sourdough bread typically lasts 4-5 days at room temperature in a bread box or similar container. Sourdough naturally stays fresh longer than commercial yeast bread due to its acidic nature, which inhibits mold growth.
Q: What’s the best way to store sourdough bread for maximum freshness?
A: For maximum freshness, store your cooled sourdough bread in a paper bag for the first 24 hours to maintain crust quality, then transfer to a bread box for medium-term storage. For long-term storage, freezing properly wrapped sourdough bread is the best option.
Q: Should I slice my entire sourdough loaf before storing it?
A: It’s best to slice sourdough bread as needed rather than all at once, as each cut exposes more surface area to air and accelerates drying. The exception is when freezing bread, where pre-slicing provides convenient portion control.
Q: How can I tell if my sourdough bread has gone bad?
A: Your sourdough bread has gone bad if you see mold growth (typically white, green, or black spots), if it smells sour in an unpleasant way (different from the pleasant sour aroma of fresh sourdough), or if the texture has become extremely dry and crumbly.
Ready to Keep Your Sourdough Fresh Like a Pro?
Now that you know how to store sourdough bread the right way, it’s time to put these tips into action. Whether you’re new to baking or a seasoned sourdough enthusiast, these storage techniques can help you enjoy fresh, flavorful bread for days.
We’d love to hear from you — share your favorite storage method or ask a question in the comments below.
If you found this guide helpful, feel free to share it with fellow bakers or on your social channels.
Looking for more sourdough inspiration? Check out these related recipes:
- How to Make the Perfect Sourdough Starter
- Crispy Sourdough Pancakes Recipe
- Overnight No-Knead Sourdough Bread
For more baking tips, tried-and-tested recipes, and exclusive sourdough guides, subscribe to our newsletter or follow us on Instagram. Stay connected and keep your baking journey going strong.
Git more recipes you might like
- Moose Tracks Ice Cream.
- Cold Brew Coffee.
- Best Chocolate Bar for You.
- Bread and Cheese Pairings.
- Cottage Cheese Cookie Dough.
- Kids’ Birthday Cake Designs.
Did You Try Our Recipe?
This guide on how to store sourdough bread is incredibly helpful!
This guide on how to store sourdough bread is incredibly helpful! I’ve always struggled with keeping it fresh, and your tips made a big difference. Thank you for the beautiful article and for sharing such practical advice! 🍞🙏