Nestle Chocolate Chip Cookies 🍪 | #1 Original Recipe!
Table of contents
Table of Contents
Do you dream of sinking your teeth into warm, gooey chocolate chip cookies that melt in your mouth? The good news is, making Nestlé Chocolate Chip Cookies at home is easier than you think. In this comprehensive guide, we’ll walk you through the classic recipe step by step, share expert tips for perfect results, and explore fun variations to keep things exciting. Whether you’re a seasoned baker or just starting, this article has everything you need to create irresistible cookies every time. Let’s dive in!

A Warm, Sweet Memory of Nestlé Chocolate Chip Cookies
Think back to the first time you tasted a freshly baked chocolate chip cookie. Maybe it was during a family gathering, a school bake sale, or even a quiet evening at home. That rich aroma, the soft crunch of the edges, and the melty chocolate—it’s pure comfort food. For millions of people around the world, Nestlé Toll House Chocolate Chip Cookies represent more than just a snack; they’re a symbol of happiness, nostalgia, and connection.
Today, we’re bringing that magic into your kitchen. With our detailed instructions, insider secrets, and helpful tips, you’ll be able to recreate these iconic treats with ease. Let’s get started—roll up your sleeves and prepare to bake something amazing!
The History Behind Nestlé Chocolate Chip Cookies
Before we jump into the recipe, let’s take a moment to appreciate the story behind this beloved dessert. Did you know that the chocolate chip cookie wasn’t always part of our culinary landscape? It all started in 1930 when Ruth Graves Wakefield, owner of the Toll House Inn in Massachusetts, accidentally invented what would become one of America’s favorite cookies.
One day, while baking chocolate cookies, Ruth ran out of regular baking chocolate. Thinking quickly, she chopped up a bar of Nestlé semisweet chocolate and added it to her dough, expecting the chocolate to melt evenly throughout. Instead, the chocolate held its shape, creating delightful pockets of gooey goodness. Her creation became an instant hit, and soon after, she partnered with Nestlé to include her recipe on their chocolate bars. The rest, as they say, is history.
Fun Fact: The original recipe called for cutting up a bar of Nestlé semisweet chocolate instead of using pre-made chips!

Ingredients You’ll Need for Perfect Nestlé Chocolate Chip Cookies
To make these cookies, you’ll need the following ingredients:
| Ingredient | Quantity | Purpose |
|---|---|---|
| All-Purpose Flour | 2¼ cups | Provides structure |
| Baking Soda | 1 tsp | Helps cookies rise |
| Salt | 1 tsp | Enhances flavor |
| Unsalted Butter | 1 cup (melted) | Adds richness and moisture |
| Granulated Sugar | ¾ cup | Creates crispness |
| Brown Sugar | ¾ cup | Contributes chewiness |
| Pure Vanilla Extract | 1 tsp | Boosts aroma |
| Large Eggs | 2 | Acts as a binder |
| Nestlé Semi-Sweet Chocolate Chips | 2 cups | The star of the show! |
Key Tip: Use high-quality chocolate chips for superior flavor. If possible, go for the real deal—Nestlé Toll House morsels.
Step-by-Step Guide to Making Nestlé Chocolate Chip Cookies
Now that you have your ingredients ready, let’s break down the process into simple steps:
Step 1: Preheat Your Oven
Set your oven to 375°F (190°C). Line baking sheets with parchment paper to prevent sticking and ensure even browning.
Step 2: Mix Dry Ingredients
In a medium-sized bowl, combine the flour, baking soda, and salt by whisking them together thoroughly. This ensures no lumps remain and helps distribute the leavening agents evenly.
Step 3: Cream Wet Ingredients
In a large mixing bowl, combine melted butter, granulated sugar, and brown sugar. Stir until smooth and creamy. Add the vanilla extract for extra depth of flavor.
Step 4: Combine Wet and Dry Mixtures
Slowly incorporate the dry ingredients into the wet mixture, stirring gently just until everything is fully combined. Avoid overmixing, as this can result in cookies that turn out tough instead of chewy and delicious.
Step 5: Incorporate Eggs
Add the eggs one at a time, making sure each egg is fully mixed into the batter before adding the next. This ensures a smooth and evenly blended dough. This step binds the dough together and adds moisture.
Step 6: Fold in Chocolate Chips
Gently stir in the Nestlé semi-sweet chocolate chips. Be sure not to overwork the dough at this stage to preserve the texture.
Step 7: Scoop and Bake
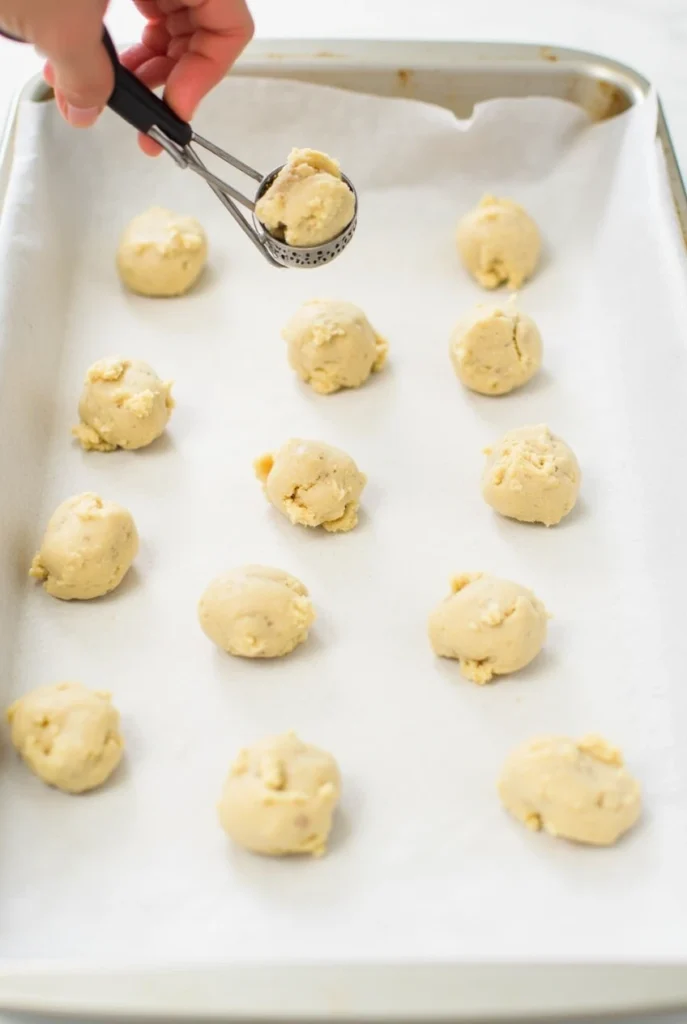
Using a tablespoon or cookie scoop, drop rounded portions of dough onto the prepared baking sheets, spacing them about 2 inches apart. Bake for 9–11 minutes, or until the edges are golden brown but the centers are still slightly soft.

Tips for Perfectly Chewy Cookies
Achieving the perfect balance between chewy centers and crispy edges takes practice, but these tips will set you up for success:
- Use Melted Butter: Unlike softened butter, melted butter creates a softer, chewier texture.
- Don’t Overmix: Stop mixing as soon as all ingredients are combined to avoid developing gluten, which can make cookies tough.
- Chill the Dough: For thicker, taller cookies, refrigerate the dough for at least 30 minutes before baking.
- Underbake Slightly: Remove cookies from the oven when their edges are set but the centers look slightly underdone—they’ll continue cooking on the pan.
Quote from a Professional Baker: “The secret to perfect chocolate chip cookies lies in finding the right balance between sweetness, richness, and texture.”
Variations on the Classic Recipe
Once you’ve mastered the original recipe, why not try something new? Here are a few ideas to add some excitement and variety:
- Peanut Butter Chocolate Chip Cookies: Add ½ cup of creamy peanut butter to the batter for a nutty twist.
- White Chocolate Macadamia Nut Cookies: Substitute white chocolate chips and chopped macadamia nuts for a tropical flair.
- Spiced Chocolate Chip Cookies: Incorporate cinnamon, nutmeg, or ginger for a warm, festive touch.
- Vegan Chocolate Chip Cookies: Replace eggs with flaxseed “eggs” (1 tbsp ground flax + 2½ tbsp water per egg) and use plant-based butter.

Common Mistakes to Avoid
Even experienced bakers encounter hiccups sometimes. Here are a few common mistakes people make and how you can avoid them:
- Overbaking: This leads to dry, hard cookies. Keep a close watch on them during the final few minutes of baking.
- Using Old Ingredients: Stale flour or expired baking soda affects the rise and taste of your cookies.
- Crowding the Pan: Leave enough space between cookies to allow even browning.
- Skipping the Chill: Chilling dough helps maintain shape and prevents spreading.
FAQ Section
Q1: Can I Freeze Nestlé Chocolate Chip Cookie Dough?
Absolutely! Shape the dough into balls, place them on a tray, and freeze until solid. Place the dough balls in a freezer-safe bag and store them for up to three months. When ready to bake, simply pop them straight into the oven, adding a minute or two to the baking time.
Q2: What Makes Nestlé Chocolate Chip Cookies Special?
It’s all about the combination of premium chocolate chips, balanced ratios of ingredients, and simple techniques. Plus, the rich history adds charm to every bite.
Q3: How Long Do Nestlé Chocolate Chip Cookies Stay Fresh?
Stored in an airtight container at room temperature, they stay fresh for up to five days. For extended storage, freeze the baked cookies for up to three months.
Conclusion: Indulge in the Magic of Nestlé Chocolate Chip Cookies
There’s nothing quite like biting into a perfectly baked Nestlé Chocolate Chip Cookie. From its rich chocolate chunks to its perfectly balanced texture, this classic treat never fails to delight. Now that you’ve learned the original recipe, along with tips, tricks, and creative variations, it’s time to put your newfound skills to the test.
So grab your ingredients, preheat your oven, and let’s start baking! 🍪🔥 Remember, practice makes perfect, so don’t be afraid to experiment and find your signature style. Happy baking—and don’t forget to share your creations with loved ones!
Call-to-Action
We’d love to hear about your experience! Share your photos, tips, or questions in the comments below. And if you enjoyed this recipe, consider subscribing to our newsletter for more delicious ideas delivered straight to your inbox. Let’s keep the joy of baking alive—one cookie at a time! 🍪
Did You Try Our Recipe?
There are no reviews yet. Be the first one to write one.

