
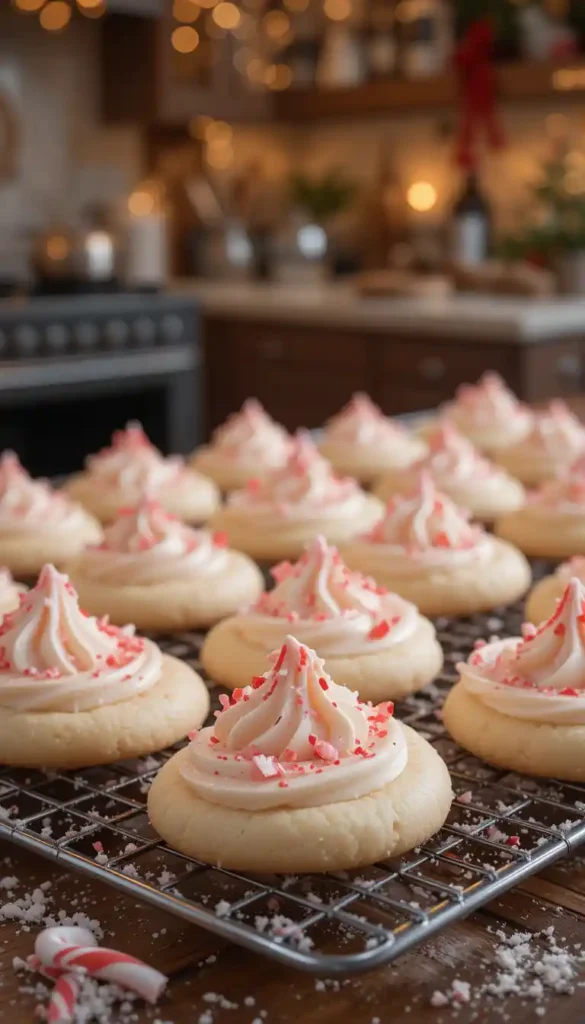
How to Make 3-Ingredient Peppermint Cloud Cookies Fast!
Have you ever found yourself scrambling for a last-minute holiday treat that still manages to impress? Perhaps you’ve stared hopelessly into your pantry, wondering how to create something magical with just a handful of ingredients. That’s exactly where these 3-ingredient peppermint cloud cookies come to the rescue!

The holiday season brings joy, celebration, and the occasional surprise guest. I still remember frantically searching for a quick yet impressive recipe when relatives surprised us with an impromptu Christmas Eve visit two years ago. These peppermint cloud cookies saved the day—and might I add, earned me quite a reputation as a “baking wizard” among family members.
Light as air, delightfully minty, and impossibly easy to make, these cookies have become my secret weapon for holiday entertaining. The best part? Chances are, you already have everything on hand to make these right now. No complicated shopping lists, no fancy equipment, just pure holiday magic in minutes.
Table of Contents
Table of Contents
What Makes These Peppermint Cloud Cookies Special?

The Perfect Holiday Cookie Trifecta
Before diving into the recipe, let’s talk about why these cookies deserve a spot in your holiday baking rotation:
- Beautifully simple – just 3 basic ingredients stand between you and cookie perfection
- Deceptively elegant – guests will think you spent hours in the kitchen
- Festively flavorful – the perfect balance of sweetness and peppermint creates that iconic holiday taste
Most cookie recipes demand butter, flour, rising agents, and numerous other ingredients. These peppermint cloud cookies strip baking down to its magical essence. The science behind meringue creates a delightful texture that’s crisp on the outside while remaining marshmallow-soft on the inside.
“The first bite of these cookies feels like tasting a sweet, minty cloud—they dissolve almost instantly, leaving behind nothing but holiday cheer!”
When holiday stress threatens to overwhelm, having this recipe in your back pocket feels like holding a secret superpower. While others scramble with complex cookie exchanges and elaborate desserts, you’ll create something memorable in a fraction of the time.
Ingredients and Equipment
The Magic 3 Ingredients
Let’s get straight to the heart of what makes these cookies so wonderfully simple:
| Ingredient | Amount | Notes |
|---|---|---|
| Egg whites | 3 large | The room temperature for the best volume |
| Granulated sugar | ¾ cup | Creates the perfect meringue structure |
| Peppermint extract | ½ teaspoon | The secret to that festive flavor |
That’s it! Just three simple ingredients transform into something truly spectacular. The chemistry is fascinating—egg whites contain proteins that, when beaten, unfold and create a network of bubbles. The sugar stabilizes those bubbles, creating a glossy, stable structure that bakes into cloud-like cookies.
Optional Additions for Extra Holiday Flair
Want to take your peppermint cloud cookies to the next level? Consider these festive additions:
| Addition | Amount | Purpose |
|---|---|---|
| Crushed candy canes | 2 tablespoons | For sprinkling on top before baking |
| Red food coloring | A few drops | Creates festive swirls when gently folded in |
| Mini chocolate chips | ¼ cup | For a chocolate-mint variation, folded in gently |
These additions remain completely optional—your cookies will taste magnificent with just the basic three ingredients! However, if you’re looking to add visual appeal or complementary flavors, these suggestions work beautifully.
Equipment You’ll Need
Gather these basic tools before beginning:
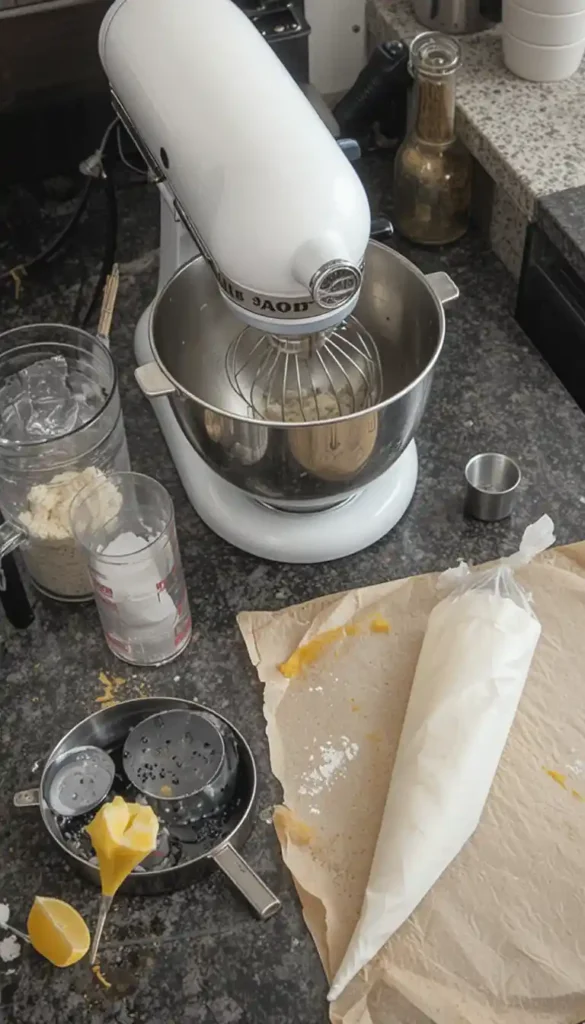
- Stand mixer or hand mixer (while possible to whip by hand, electrical assistance saves significant time and effort)
- Large mixing bowl (preferably glass or metal for best results)
- Baking sheet
- Parchment paper (essential to prevent sticking)
- Piping bag with star tip (optional but creates prettier cookies; a zip-top bag with corner snipped works too)
- Measuring cups and spoons
Step-by-Step Instructions
Preparation Phase
Success with meringue cookies begins with proper preparation. Follow these steps before mixing anything:
- Preheat your oven to 225°F (107°C). The low temperature ensures your cookies dry out rather than bake, creating that perfect melt-in-your-mouth texture.
- Line baking sheets with parchment paper. This non-negotiable step prevents sticking and ensures easy removal.
- Separate egg whites carefully. Even the smallest drop of yolk can prevent your whites from achieving full volume. For best results, separate eggs while cold, then allow whites to reach room temperature before beating.
- Wipe down all equipment with a drop of vinegar or lemon juice. This eliminates any trace oils that might interfere with your meringue.
Creating Your Meringue Base
Now for the magic:
- Beat egg whites in your clean, dry bowl at medium speed until foamy. This initial foaming stage usually takes about 1 minute.
- Slowly add the sugar, one tablespoon at a time, while continuing to beat the mixture. This slow addition ensures the sugar dissolves properly—a key factor in avoiding gritty cookies.
- Turn up the speed and keep beating until the mixture forms stiff, glossy peaks. You’ll know you’ve reached this stage when the meringue holds its shape when the beater is lifted, and the tip stands upright with perhaps a slight curl at the top. This typically takes 5-7 minutes.
- Add the peppermint extract and beat for just 5 to 10 seconds, mixing until fully combined. Overbeating after adding flavoring can deflate your carefully created air structure.

Forming Your Cloud Cookies
Now comes the fun part—shaping your ethereal creations:
- Transfer meringue to a piping bag fitted with a star tip if desired. Don’t have a piping bag? Just use two spoons to gently drop mounds of the mixture onto your lined baking sheet.
- Pipe or spoon small mounds about 1½ inches in diameter onto the parchment paper, leaving about 1 inch between each cookie. Remember that these won’t spread much during baking.
- Sprinkle with crushed candy canes if using, pressing very gently to ensure they stick without deflating your meringue.

Baking to Perfection
Patience creates perfection with these cookies:
- Bake for 60-75 minutes until cookies feel dry to the touch and can be lifted easily from the parchment paper. They should not take on any color, remaining white or just barely cream-colored.
- Turn off the oven when baking completes, but don’t remove cookies yet! Instead, leave them inside with the door slightly ajar for 1 hour. This gradual cooling prevents the dramatic temperature change that can cause collapse.
- Let the cookies cool fully on a wire rack before serving or storing.

Troubleshooting Your Peppermint Cloud Cookies
Common Meringue Problems Solved
Even experienced bakers sometimes encounter meringue mysteries. Here’s how to solve the most common issues:
- Cookies cracking excessively? Your oven might be too hot. Next time, lower the oven temperature by 25 degrees to help prevent overbaking.
- Not forming stiff peaks despite lengthy beating? Check for yolk contamination and try adding a pinch (⅛ teaspoon) of cream of tartar next time—it stabilizes the egg whites.
- Cookies turning yellow or brown? Lower your oven temperature or position the rack lower in the oven, away from the heating element.
- Are cookies becoming sticky after storage? Humidity is the culprit. Try adding cornstarch (1 teaspoon) to the recipe next time, or store with a small silica gel packet.
Remember that meringue cookies are particularly sensitive to humidity. Avoid making these on rainy days if possible, or plan to serve them immediately rather than storing.
Storing Your 3-Ingredient Peppermint Cloud Cookies
Keep Them Fresh
Proper storage extends the life of your cloud cookies:
- Store in an airtight container at room temperature. Glass containers work better than plastic.
- Place parchment paper between layers to avoid sticking and keep the cookies from breaking.
- Your cookies will stay fresh for up to 1 week when properly stored.
- Never refrigerate meringue cookies—the moisture ruins their texture.
If your cookies become slightly chewy after storage, you can refresh them by placing them in a 200°F oven for about 10 minutes, then cooling completely before serving.
Delicious Variations to Try
Beyond Basic Peppermint
Once you’ve mastered the basic recipe, try these creative twists:
- Chocolate-Dipped Clouds: After cookies cool completely, dip bottoms in melted chocolate, then place on parchment paper until chocolate sets.
- Colorful Swirls: Divide the meringue into portions before adding the extract. Color each portion differently, then gently swirl together when placing on baking sheets.
- Double Mint: Swap out half the peppermint extract for mint extract to create a refreshing twist on the classic flavor.
- Coffee Clouds: Substitute peppermint extract with ½ teaspoon coffee extract for a completely different flavor experience.
- Coconut Dusted: Gently fold in 2 tablespoons toasted coconut flakes before piping.
Each variation maintains the simplicity of the original while creating new flavor experiences. The basic technique remains your canvas for creativity.
Perfect Pairings for Your Peppermint Cloud Cookies
Holiday Beverages That Complement
Elevate your cookie experience with these perfect beverage pairings:
- Hot chocolate: The rich, creamy chocolate beautifully complements the light, minty cookies
- Peppermint tea: Double the minty goodness with this caffeine-free option
- Coffee: The bitterness balances the cookie’s sweetness perfectly
- Vanilla milk: A kid-approved pairing that tastes just like melted ice cream—sweet, creamy, and perfectly nostalgic.
- Mulled wine: For adult gatherings, this spiced beverage creates a sophisticated contrast
Serve your cookies alongside a beverage bar during holiday gatherings for an interactive experience guests will remember.
Why These Cookies Make Perfect Gifts
Looking for an impressive homemade gift that won’t break the bank or consume your entire weekend? These 3-ingredient peppermint cloud cookies pack beautifully in cellophane bags tied with festive ribbon. Add a handwritten recipe card to give your gift a warm, personal touch.
Their lightweight makes them ideal for shipping to distant loved ones, too—just package carefully with bubble wrap to prevent breakage. Unlike many holiday cookies, these won’t become stale quickly, making them perfect for sending across the miles.
Conclusion
These 3-ingredient peppermint cloud cookies prove that holiday baking doesn’t require professional skills or a pantry overflowing with specialized ingredients. With just egg whites, sugar, and peppermint extract, you’ve created something truly magical—cookies that look like they stepped off a professional bakery display but required minimal effort.
The simplicity of this recipe makes it perfect for last-minute entertaining, cookie exchanges where you need quantity without sacrificing quality, or those evenings when you simply crave something sweet without the hassle.
Remember that these light, airy treats contain significantly less fat than traditional cookies, making them a relatively guilt-free indulgence during a season often characterized by heavy foods.
Whether you’re an experienced baker looking to simplify your holiday routine or a novice seeking a foolproof way to impress, these peppermint cloud cookies deserve a permanent place in your recipe collection. The hardest part truly will be waiting for them to cool before devouring them all
Frequently Asked Questions
Everything You Need to Know About 3-Ingredient Peppermint Cloud Cookies
Q: Can I make these 3-ingredient peppermint cloud cookies ahead of time?
A: Absolutely! They store well for up to a week in an airtight container at room temperature. For best results, make them no more than 2-3 days before serving if you live in a particularly humid climate.
Q: Why did my peppermint cloud cookies turn out chewy instead of crisp?
A: The most common cause is humidity. Try baking them longer at a lower temperature or using a dehumidifier in your kitchen. Adding 1 teaspoon of cornstarch to the sugar can also help absorb excess moisture.
Q: Can I use peppermint candy canes instead of extract in these 3-ingredient peppermint cloud cookies?
A: Yes! Crush them very finely (almost to powder) and fold gently into the meringue instead of using extract. You’ll need about 2-3 tablespoons. Be aware that this might add a slight pink tint to your cookies.
Q: Are these peppermint cloud cookies gluten-free?
A: Yes! These cookies contain no gluten ingredients, making them perfect for guests with celiac disease or gluten sensitivity. Just ensure your peppermint extract is certified gluten-free, as some brands add ingredients that might contain traces of gluten.
Q: How do I know when my 3-ingredient peppermint cloud cookies are done baking?
A: They should be dry to the touch and lift easily from the parchment paper without sticking. The bottom should feel firm, and the cookie should be completely dry throughout with no soft center.
Q: Can I double the recipe for these 3-ingredient peppermint cloud cookies?
A: Yes, the recipe doubles beautifully. However, you might need to beat the egg whites slightly longer to achieve the same stiff peaks, and you may need to work in batches depending on your mixer’s capacity.
Q: Why did my meringue deflate when I added the peppermint extract?
A: This typically happens when the extract is added too forcefully or when too much is added at once. Next time, try adding just a drop or two at a time while beating very slowly, or dilute the extract with a teaspoon of water before adding.
Q: Can I add food coloring to my peppermint cloud cookies?
A: Absolutely! Gel food coloring works best as it doesn’t add additional liquid. Add just a tiny amount after achieving stiff peaks, and fold gently rather than beating to maintain volume.

Try These Magical Peppermint Cloud Cookies Today
Ready to impress with the easiest holiday cookie you’ll ever make? Using only three simple ingredients, you’ll whip up a refreshing, minty treat that’s sure to leave a lasting impression.
Tried the recipe? Share your experience in the comments below—I’d love to hear how yours turned out or what fun twists you added.
If you enjoyed this, don’t forget to leave a rating. It helps other holiday bakers find this recipe, too.
Looking for more easy and festive treats? Check out these next:
Want more simple holiday recipes delivered straight to your inbox? Sign up for my newsletter or follow me on Instagram and Pinterest for fresh weekly inspiration and seasonal baking ideas!
Did You Try Our Recipe?
There are no reviews yet. Be the first one to write one.