
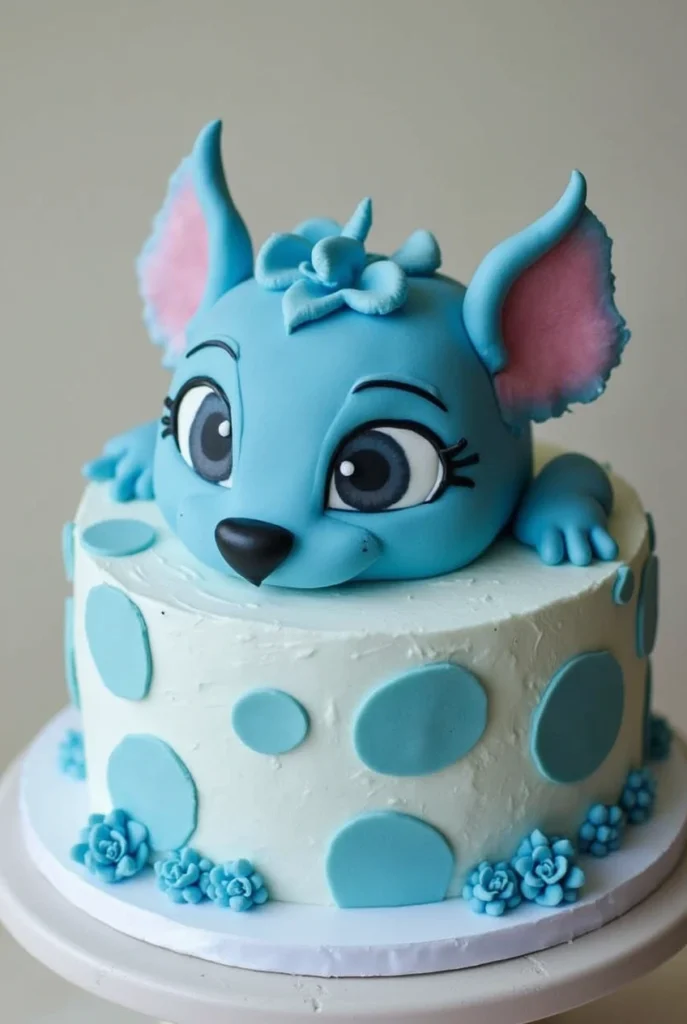
How to Make a Fun Bluey Cake in 5 Easy Steps
Have you ever wanted to create something truly magical in your kitchen that would bring joy to your little one’s face? Imagine this: a vibrant, delightful cake shaped like their favorite character—Bluey! If the thought of baking such a masterpiece seems daunting, don’t worry. This comprehensive guide is crafted specifically for you, the beginner baker who wants to surprise and delight with a Bluey-themed cake. Together, we’ll break down every step so that even if it’s your first time attempting something like this, you can achieve amazing results.
Table of Contents
Table of Contents
Why Choose a Bluey Cake?
There’s no denying the charm of Bluey, the beloved animated character from Australia who has captured the hearts of children worldwide. Whether you’re planning a birthday party, hosting a playdate, or simply looking for a fun weekend activity, creating a Bluey cake is more than just baking—it’s about crafting memories. Here are a few reasons why choosing a Bluey cake makes sense:
- Connection: Bluey resonates deeply with kids because of her playful spirit and imaginative adventures. By incorporating her into a cake, you’re giving them a piece of their world they can enjoy physically.
- Creativity: Baking allows you to express yourself creatively. From designing Bluey’s signature blue coat to adding personalized touches, there’s endless room for innovation.
- Learning Opportunity: For parents, baking together provides an excellent chance to bond while teaching valuable skills like measurement, timing, and patience.
Fun Fact: Did you know that Bluey has been viewed by over 1 billion people globally since its debut? That kind of popularity means your creation will likely be met with excitement!
“A Bluey cake is more than just a sweet treat; it’s a delightful celebration of imagination, creativity, and the joy of family togetherness.”
Ingredients You’ll Need
Before diving into the recipe, let’s gather everything you’ll need. Below is a detailed list presented in table format for easy reference:
| Category | Ingredient | Quantity |
|---|---|---|
| Base Cake | All-purpose flour | 2 cups |
| Sugar | 1½ cups | |
| Eggs | 3 large eggs | |
| Milk | 1 cup | |
| Vanilla extract | 1 teaspoon | |
| Baking powder | 1½ teaspoons | |
| Frosting | Butter | ½ cup softened |
| Powdered sugar | 4 cups | |
| Coloring & Design | Blue food coloring gel | As needed |
| White chocolate | 200g |
Note: Feel free to adjust quantities based on the size of your cake. Additionally, consider sourcing high-quality ingredients from reputable suppliers to ensure superior taste and texture.

Tools and Equipment Required
Now that you’ve gathered your ingredients, here’s what you’ll need in terms of tools and equipment:
- Mixing bowls: Large enough to hold all your ingredients comfortably.
- Electric mixer: While optional, it saves time and effort when mixing batter and frosting.
- Cake pans: Two 8-inch round pans work perfectly for this recipe. Ensure they’re greased and floured before use.
- Piping bags and tips: These are Essential for decorating details like Bluey’s ears, nose, and spots.
- Offset spatula: Helps spread frosting evenly across the cake layers.
If budget constraints exist, remember that many items can serve multiple purposes. For instance, a sturdy spoon works as a makeshift mixer in a pinch.
Step-by-Step Instructions
Let’s dive into the heart of the matter: how to bake and decorate your very own Bluey cake. Each step is broken down below.
Step 1 – Preparing the Cake Batter
Start by preheating your oven to 350°F 175°C. Once ready, follow these steps:
- In a large mixing bowl, combine dry ingredients: flour, sugar, baking powder, and a pinch of salt. Mix thoroughly until well combined.
- Gradually add the wet ingredients: eggs, milk, and vanilla extract. Stir gently using either a whisk or an electric mixer until smooth. Be careful not to overmix, as this could lead to dense cakes.
- Divide the batter evenly between the prepared cake pans, ensuring each pan receives roughly the same amount.
Step 2 – Baking the Cake Layers
Once your batter is ready, place the pans in the preheated oven. Bake for about 25–30 minutes, or until a toothpick inserted into the center of the cake emerges clean.
After removing the cakes from the oven, allow them to cool completely before proceeding. Cooling is crucial, as applying frosting to warm cakes may cause them to melt and ruin your design.
Step 3 – Making the Frosting
While your cakes cool, prepare the frosting:
- Begin by creaming softened butter until light and fluffy. This step ensures a creamy consistency once powdered sugar is added.
- Gradually incorporate powdered sugar, one cup at a time, beating continuously until fully mixed. Add milk sparingly to reach the desired spreading consistency.
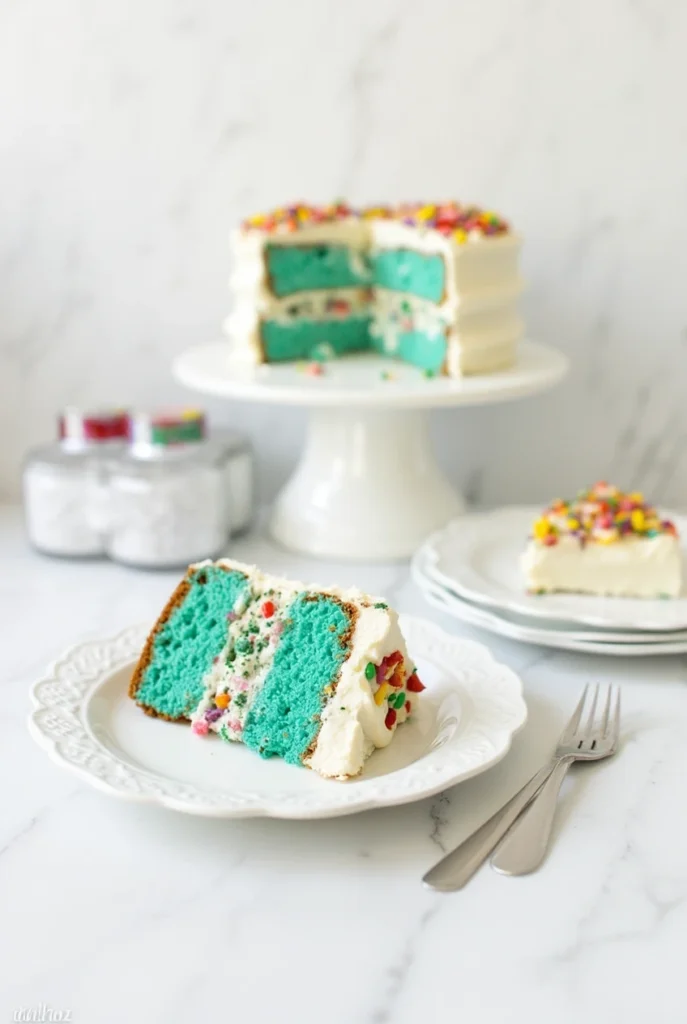
- Finally, introduce blue food coloring gel drop by drop, stirring after each addition until achieving the perfect shade reminiscent of Bluey’s coat.
Step 4 – Decorating Your Bluey Cake
With your cakes baked and frosted, it’s time to bring Bluey to life! Follow these tips:
- Use white chocolate melted in a piping bag to outline Bluey’s features. Start with her head shape, followed by facial details like eyes, ears, and spots.
- To achieve smooth lines, practice drawing shapes on parchment paper before transferring designs onto the cake.
- Consider adding additional elements like flowers or paw prints around the base to enhance the overall aesthetic.
Tips for Success
Even seasoned bakers encounter challenges occasionally. Here are a few tips to help you steer clear of common mistakes:
- Overmixing: Overworking the batter introduces excess air, leading to collapsed cakes. Always mix gently until just combined.
- Uneven Cooling: Rotate cakes halfway through baking to ensure even heat distribution. Afterward, let them rest on wire racks instead of directly on countertops.
- Color Consistency: Test small amounts of food coloring before committing to larger portions. Too much dye might alter the flavor.
Variations and Ideas
Though this guide focuses on a classic Bluey cake, feel free to experiment with variations tailored to your preferences:
- Flavor Options: Swap vanilla sponge for chocolate, lemon, or strawberry bases, depending on your child’s tastes.
- Design Alternatives: Instead of a full Bluey figure, try simpler patterns like paw prints or swirls inspired by her adventures.
- Themed Decorations: Pair your cake with coordinating tableware, balloons, and activities to immerse guests in the Bluey universe.
Understanding the Basics of Cake Baking
Before we delve further into the specifics of creating a Bluey cake, it’s essential to understand the fundamentals of baking. This foundational knowledge will empower you to troubleshoot issues and adapt recipes as needed.
The Science Behind Cake Baking
At its core, baking is chemistry in action. Each ingredient plays a critical role in determining the final texture, flavor, and appearance of your cake. Here’s a breakdown of the key components:
- Flour: Provides structure by forming gluten when mixed with liquid. For lighter cakes, opt for all-purpose or cake flour.
- Sugar: Adds sweetness but also contributes to browning and moisture retention during baking. Brown sugar can impart a richer flavor.
- Eggs: Act as binders, emulsifiers, and leavening agents. They help create a tender crumb and improve shelf life.
- Leaveners: Baking powder and baking soda react with acids to produce carbon dioxide gas, causing the batter to rise. Always use fresh learners for optimal results.
Understanding these principles allows you to make informed decisions when tweaking recipes or troubleshooting failures.
Common Mistakes to Avoid
Even experienced bakers occasionally stumble upon pitfalls. Here are a few common mistakes to be mindful of:
- Overmixing Batter: Excessive stirring develops too much gluten, resulting in dense cakes. Mix only until the ingredients are just combined.
- Incorrect Oven Temperature: An oven that’s too hot or too cold affects baking times and outcomes. Invest in an oven thermometer for accuracy.
- Improper Measuring: Use separate measuring cups and spoons for dry and wet ingredients. Level off the flour with a knife for precise amounts.
By familiarizing yourself with these basics, you’ll significantly increase your chances of success.
Enhancing Your Bluey Cake with Creative Techniques
Once you’ve mastered the basics, it’s time to elevate your Bluey cake with creative techniques. These methods add depth, dimension, and personality to your creation.
Achieving the Perfect Shade of Blue
Bluey’s signature hue isn’t just any shade—it’s vibrant, playful, and instantly recognizable. To replicate this color accurately, consider the following tips:
- Use Gel Food Coloring: Liquid dyes often dilute the consistency of frosting. Opt for concentrated gel-based colors for better results.
- Test Incrementally: Add drops of blue coloring gradually, mixing thoroughly after each addition. Stop once you achieve the desired intensity.
- Blend Colors Carefully: If achieving a specific shade proves challenging, experiment with combining primary colors like blue and white to fine-tune the result.
Adding Dimension with Textures
Textures bring flat designs to life. Incorporate them into your Bluey cake through these techniques:
- Piping Details: Use piping bags fitted with various tips to create intricate patterns like polka dots, swirls, and outlines. Practice on parchment paper first to refine your skills.
- Edible Markers: Available in multiple colors, edible markers allow for precise detailing without requiring advanced piping expertise. Ideal for drawing Bluey’s facial features.
- Fondant Accents: Roll out fondant in complementary shades to craft accessories like bows, flowers, or paw prints. Attach them securely using a small amount of water or piping gel.
These enhancements transform a simple cake into a visually stunning masterpiece.
Tailoring Your Recipe to Suit Dietary Needs
In today’s diverse culinary landscape, catering to dietary restrictions has become increasingly important. Fortunately, adapting traditional recipes to accommodate special diets doesn’t have to compromise taste or quality.
Gluten-Free Bluey Cake
For families managing celiac disease or gluten sensitivities, here’s how to modify the recipe:
- Substitute Flour: Replace all-purpose flour with a high-quality gluten-free blend containing rice flour, potato starch, and xanthan gum. Ensure that it’s labeled “certified gluten-free” for safety.
- Adjust Liquids: Gluten-free flours absorb more moisture than their wheat counterparts. Increase milk or other liquids slightly to maintain proper consistency.
- Strengthen the Structure: Add extra eggs or xanthan gum (if not already included in the flour blend) to compensate for the lack of gluten.
Vegan Bluey Cake
Creating a plant-based version of the classic Bluey cake is easier than you might think. Swap animal-derived ingredients with these alternatives:
- Replace Eggs: Use flaxseed meal mixed with water (1 tablespoon flaxseed + 3 tablespoons water = 1 egg) or commercial egg replacers.
- Substitute Butter: Coconut oil or vegan margarine works well in both batter and frosting. Melt solid fats before incorporating them into recipes.
- Dairy-Free Milk: Almond, oat, or soy milk serves as an excellent substitute for cow’s milk. Choose unsweetened varieties to avoid altering the recipe’s sugar balance.
With these adjustments, everyone can enjoy a delicious Bluey cake regardless of dietary preferences.
Maximizing Flavor Profiles
While appearance matters, taste remains paramount. Elevate your Bluey cake’s flavor profile with these strategies:
Infusing Flavors
Experiment with unique combinations to enhance the overall experience:
- Citrus Zest: Grate lemon or orange peel into the batter for a refreshing zing. Match citrus notes with complementary colors like yellow or green accents.
- Spices: Warm spices like cinnamon, nutmeg, or cardamom pair beautifully with chocolate or vanilla bases. Dust powdered versions lightly over finished cakes for added flair.
- Extracts: Beyond vanilla, explore almond, coconut, or peppermint extracts to introduce exciting new dimensions.
Balancing Sweetness and Acidity
Too much sugar can overwhelm delicate flavors. Counteract this by introducing acidic elements:
- Yogurt or Buttermilk: Incorporating dairy products not only enriches the texture but also balances sweetness naturally.
- Fresh Berries: Fold mashed berries into the batter or layer whole fruits between cake tiers for bursts of natural acidity.
Striking the right equilibrium ensures your Bluey cake appeals to all palates.
Presenting Your Masterpiece
No matter how exquisite your cake tastes, presentation plays a crucial role in its impact. Follow these guidelines to showcase your Bluey creation effectively:
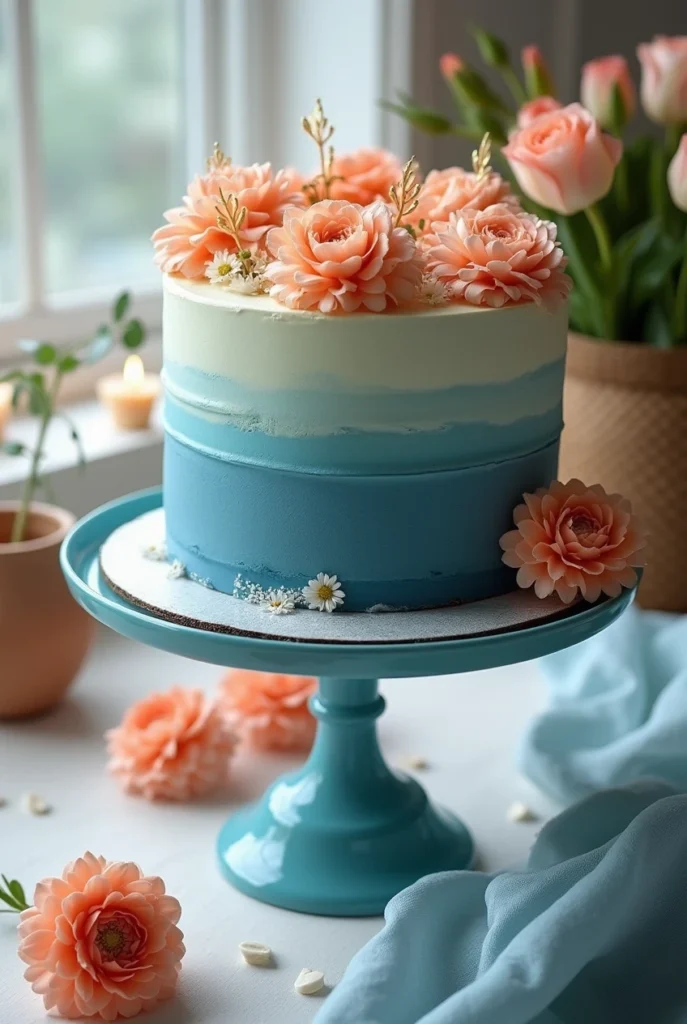
Choosing the Right Serving Plates
Select serving ware that complements your theme without overshadowing the cake itself:
- Solid Colors: Neutral tones like white or gray let the vibrant blue stand out effortlessly.
- Patterned Designs: Subtle patterns echoing Bluey’s world, such as paw prints or geometric shapes, add interest without competing visually.
Lighting and Photography Tips
Capture memories of your Bluey cake by photographing it under ideal conditions:
- Natural Light: Position your setup near windows or outdoors during the golden hour for soft, flattering illumination. Avoid harsh overhead lighting whenever possible.
- Angles Matter: Experiment with different perspectives—top-down shots emphasize details, while side views highlight layers and height.
Sharing photos online inspires others and celebrates your hard work.
Frequently Asked Questions (Expanded)
Addressing common queries helps clarify doubts and reinforces confidence among beginner bakers.
Q1: Can I freeze portions of my Bluey cake?
A: Absolutely! Wrap individual slices tightly in plastic wrap, followed by aluminum foil to prevent freezer burn. Keep them in airtight containers for storage for up to three months. Thaw at room temperature before serving.
Q2: What tools do I need for decorating?
A: While specialty equipment enhances precision, basic items suffice for most projects. Essential tools include offset spatulas, piping bags, and round tips for smooth frostings and clean lines.
Q3: How do I transport a decorated cake safely?
A: Secure your cake in a sturdy box that is slightly larger than its diameter. Place padded materials around the edges to absorb shocks during transit. Avoid stacking heavy objects atop the container.
Q4: Is there a shortcut for beginners struggling with detailed designs?
A: Simplify decorations by focusing on broad strokes rather than minute details. Consider pre-made fondant cutouts or stencils to streamline the process.
Final Thoughts and Encouragement
Congratulations—you’ve reached the end of this comprehensive guide! Armed with knowledge, techniques, and inspiration, you’re ready to tackle the challenge of creating a stunning Bluey cake. Remember, practice makes perfect, and every attempt brings you closer to mastery.
Don’t forget to share your creations with us—we’d love to see how your journey unfolds. Whether posting pictures online or inviting friends over for a tasting session, celebrating milestones reinforces motivation and fosters community spirit.
Ready to Create Your Magical Bluey Cake?
Don’t wait another minute—gather your ingredients, get baking, and let the fun begin! This Bluey cake will surely bring smiles to faces and make any occasion extra special. You’ve got this!
We’d love to hear from you! Leave a comment below and let us know how your cake turned out. Have any tips or tricks to share? Or maybe you have questions—ask away!
Don’t forget to rate this recipe and share your creation on social media. Tag us so we can see your delicious masterpiece and spread the joy!
Looking for more delightful cakes and sweet treats? Check out our other amazing dessert recipes to keep the baking fun going!
Join the fun by subscribing to our newsletter for exclusive recipes and baking tips! Or follow us on social media to stay updated on all things sweet!
Git more recipes you might like
- Perfect Zebra Cake.
- Chocolate Chip Cookies.
- Sola Bread.
- Ghirardelli Chocolate Experience.
- Best Coffee Places.
- Best Van Leeuwen Ice Cream.
Did You Try Our Recipe?
amazing website for this stunning Blue Cake recipe
Thank you so much to your amazing website for this stunning Blue Cake recipe! The combination of moist cake, creamy frosting, and vibrant blue color is absolute perfection. I can’t wait to try it out and impress my friends and family. Your article is beautifully written and the photos are incredible – keep up the fantastic work!
Yes and I love it
Absolutely stunning and delicious! The blue cake was not only visually striking but also incredibly moist and flavorful. The vanilla base had the perfect balance of sweetness, and the blue frosting was smooth and creamy. It was a huge hit at my birthday party! Highly recommend for any special occasion!